A Next.js Walkthrough Using react-intl for Localization

The complete guide for Next.js localization using react-intl
(7 minute read)
Last updated: May 2026
Prefer a different library?
Which library should I choose? Compare them: next-i18next vs react-intl, next-i18next vs next-intl, react-i18next vs react-intl
Managing Translations
Historically, developers would store all of their strings in JSON files at the root of their project. They would update their native language’s JSON file as needed and later email the file to professional translators for translation. But, lucky for us, things have gotten a lot easier 🙂
We’re going to use i18nexus to manage and machine translate all of our translations for us. Later, when we’re ready to hire professional translators, we can simply invite them to our i18nexus project to edit and confirm the machine translations instead of emailing them JSON files.
Let's do it!
If you haven’t used i18nexus before, sign up for a free account. After naming our project we’ll be directed to our language dashboard:
The first language tile is your base language. This should be your native language. Let's click Add Language to add each of the languages we previously added in our next.config.js. In my case, I’ll add Japanese and German:
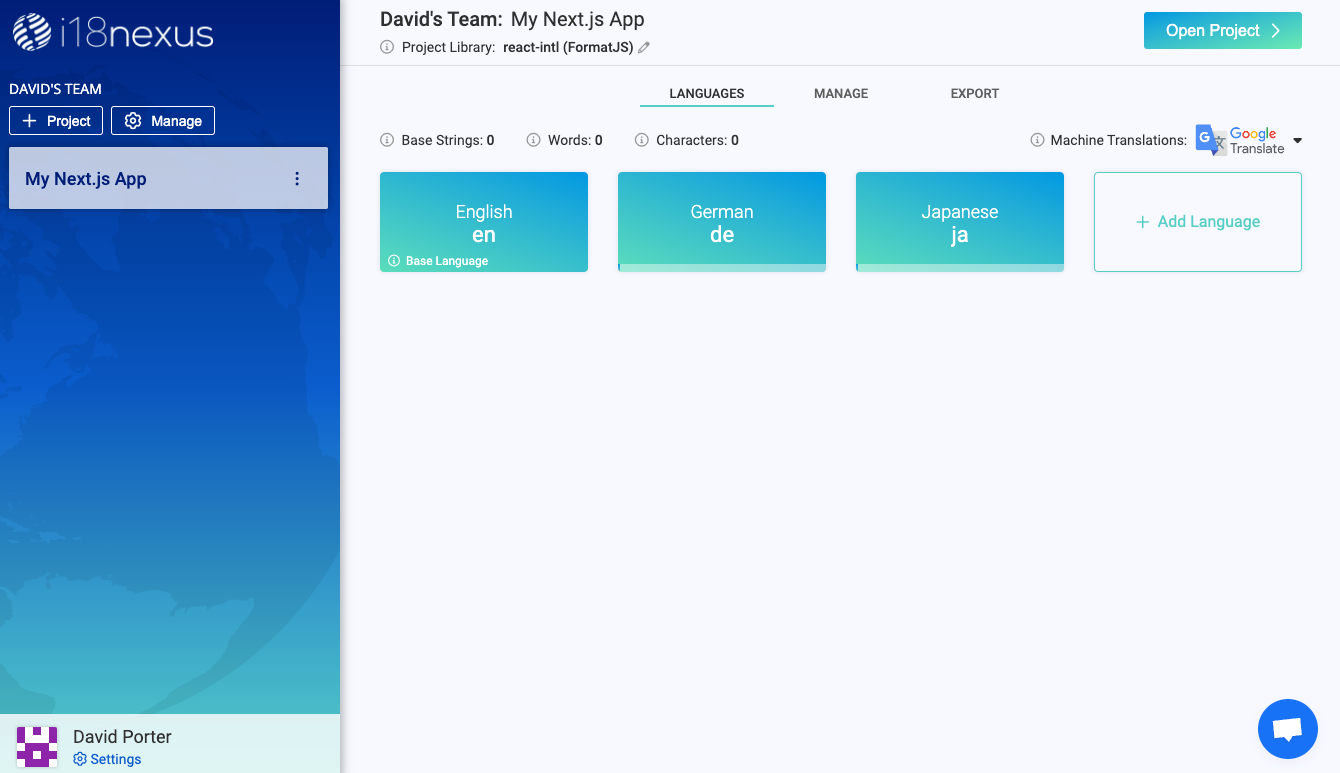
After you’ve added your languages, click Open Project in the top right corner to go to the Strings Management page.
Let’s click Add String to add a new string to our project:
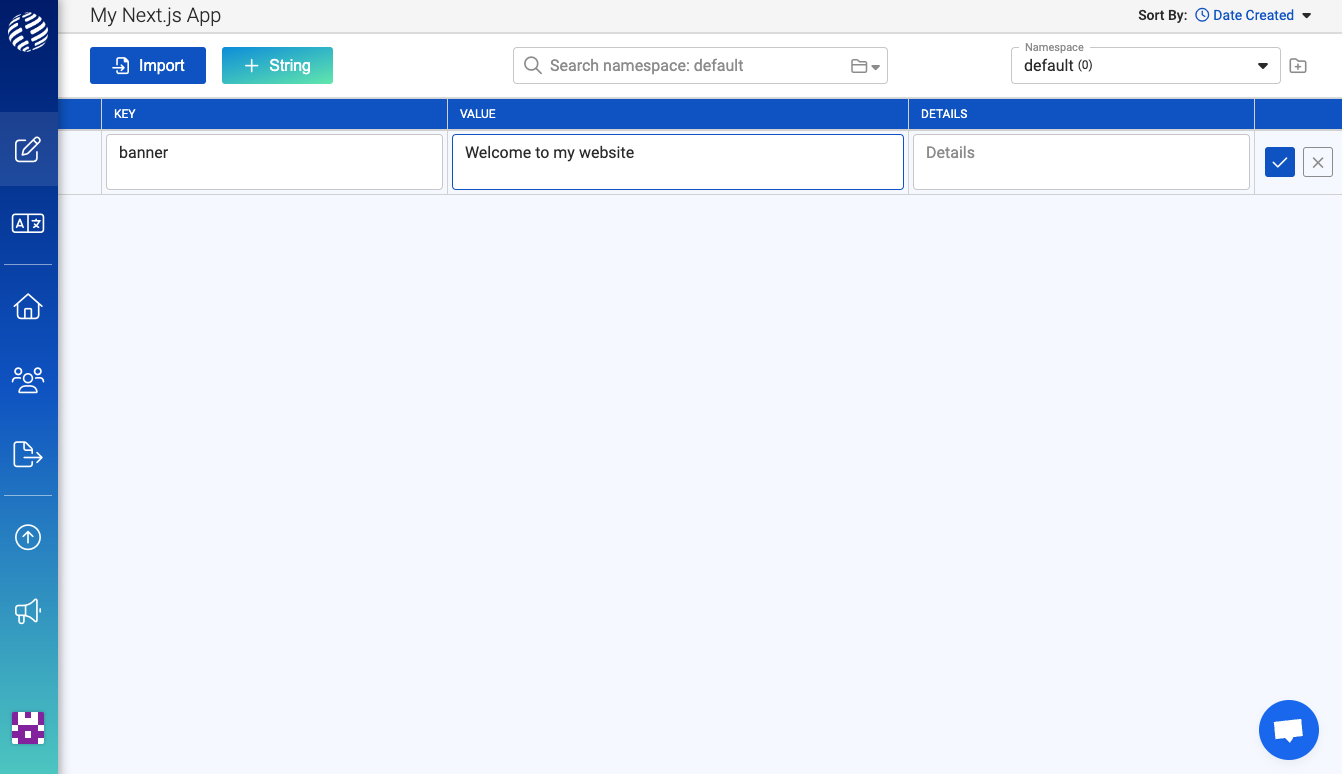
The key is what is used to reference this string in our code. It will be the same in all languages.
The value is the text that will be rendered on screen to our users.
The details field is optional. It is used to provide any extra information about the context of your string for when you’re ready to bring in professional translators. You can also add an image here for more context.
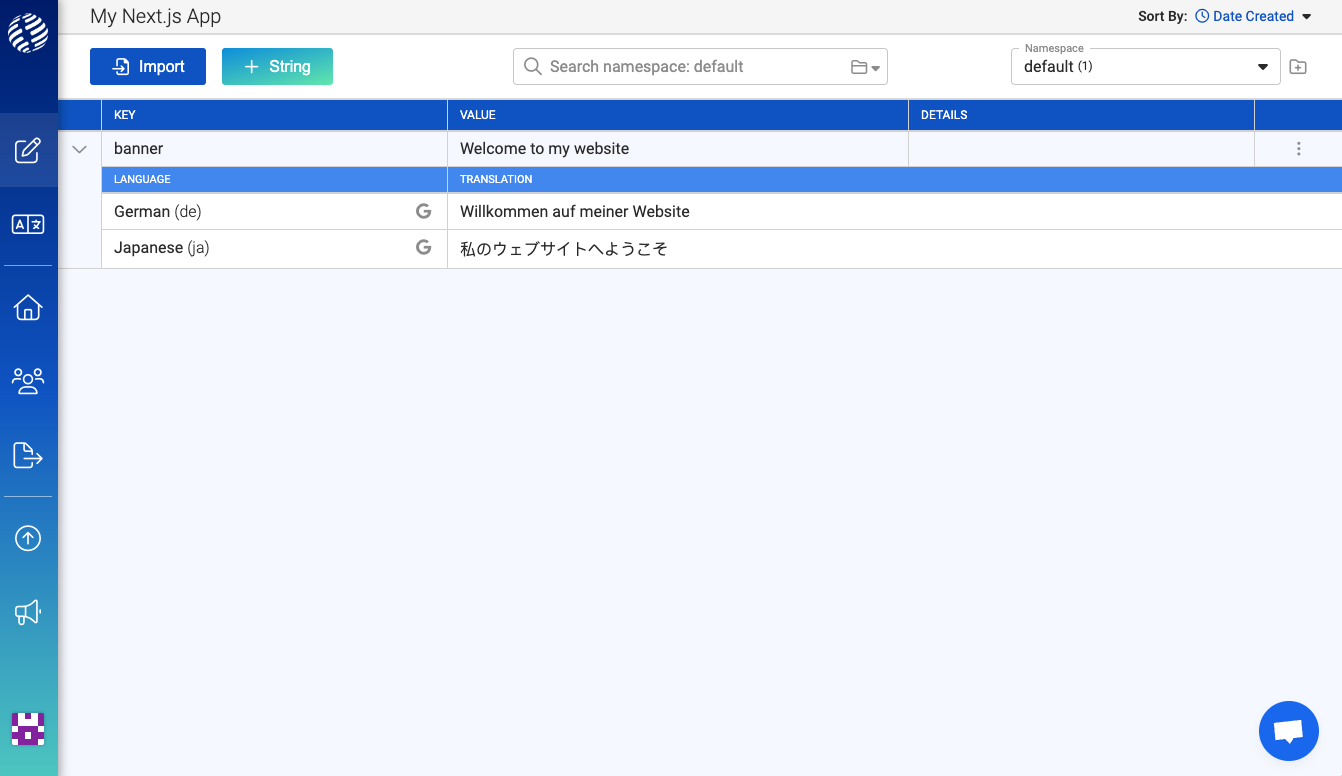
After saving the string, you can use the expand icon on the left side of the row to view its translations which have been generated with Google Translate:
Sweet!
One last thing we’ll want to take notice of is the namespaces dropdown in the top right corner. Your project should already have one namespace named “default” which is where we’ve just added our string. Let’s rename this namespace to “home”:
With Next.js, it is recommended to have one namespace per page. Namespaces help us to both organize our strings and limit how many strings Next has to load at once. It doesn’t make sense for our app to load all the strings for all the pages in our app at once, especially as our app grows.
Let’s jump back to our code and integrate these translations!
Rendering translations with react-intl
Now that we have our locale and messages as props in our page component, we can start using react-intl to render our messages.
Let’s import IntlProvider and FormattedMessage from react-intl:
import { IntlProvider, FormattedMessage } from 'react-intl';
The IntlProvider will wrap our page to let us use our messages in all child components.
The FormattedMessage component will take the message key as a prop and render the value.
Let’s integrate these components:
pages/index.jsimport Head from 'next/head';
import styles from '@/styles/Home.module.css';
import { getMessages } from '@/utils/i18n';
import { FormattedMessage, IntlProvider } from 'react-intl';
export async function getStaticProps({ locale }) {
return {
props: {
locale,
messages: await getMessages(locale, 'home')
}
};
}
export default function Home(props) {
const { locale, messages } = props;
return (
<IntlProvider messages={messages} locale={locale}>
<Head>
<title>Create Next App</title>
<meta name="description" content="Generated by create next app" />
<meta name="viewport" content="width=device-width, initial-scale=1" />
<link rel="icon" href="/favicon.ico" />
</Head>
<main className={styles.main}>
<h1>
<FormattedMessage id="banner" />
</h1>
</main>
</IntlProvider>
);
}And now let’s take a look at what is rendered to the screen:

And thanks to the i18nexus auto-translations, we can immediately see what our app looks like in other languages. All we need to do is put /es or /ja at the end of the URL:
http://localhost:3000/ja
And here’s our app in Japanese!

Next’s internationalized routing will use the locale code in the URL path to set the current language. By default, Next will load whatever language our user’s browser requests. It will use the defaultLocale if it is a language we do not support.
We can let our users change the locale by using Next’s Link component:
<Link href="/" locale="ja">Japanese</Link>
To create a menu to allow your users to change their language, you can simply list out Links for each language formatted like above.
You do not need to include the locale prop on every Link in your app. If the locale prop is omitted, Next will just retain the current locale. You only need to include the locale when explicitly changing languages.
Interpolation
Now that we’ve rendered a simple message to our page, let’s get into some more complex real-world examples.
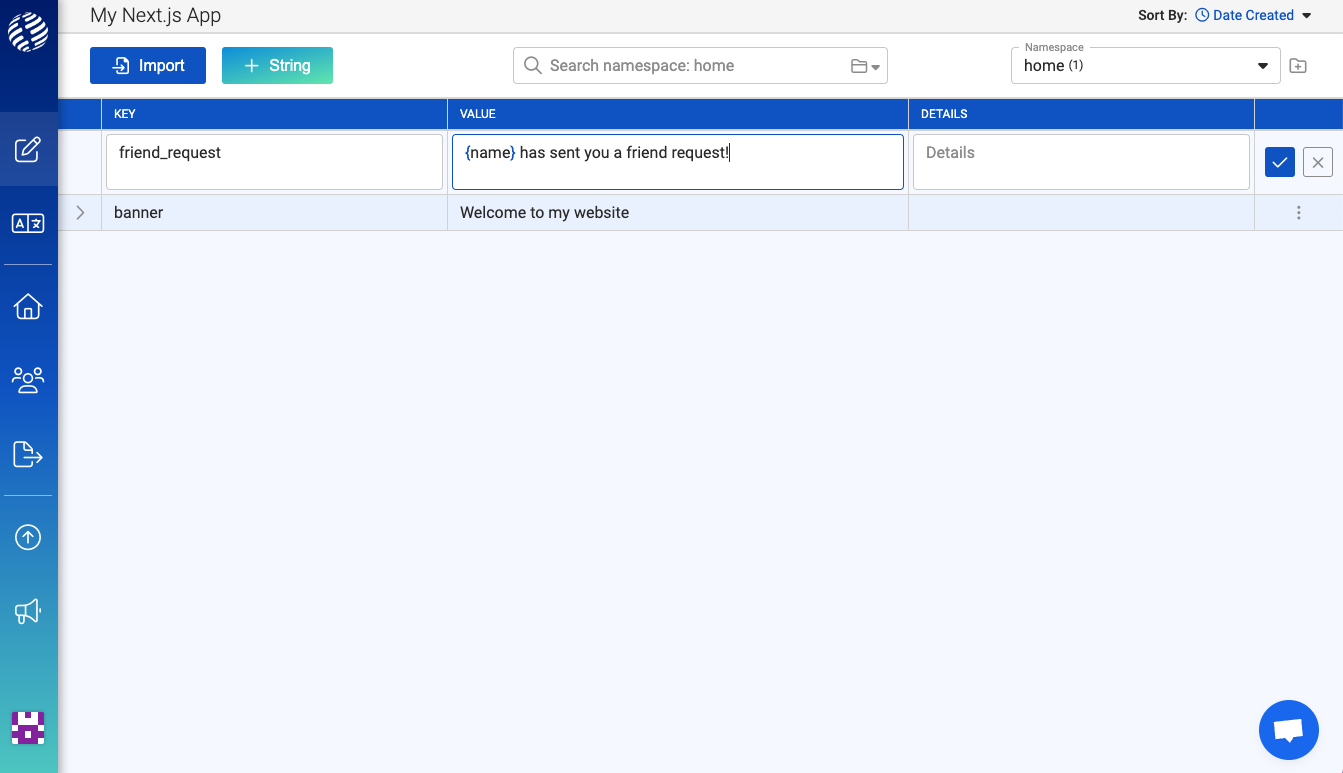
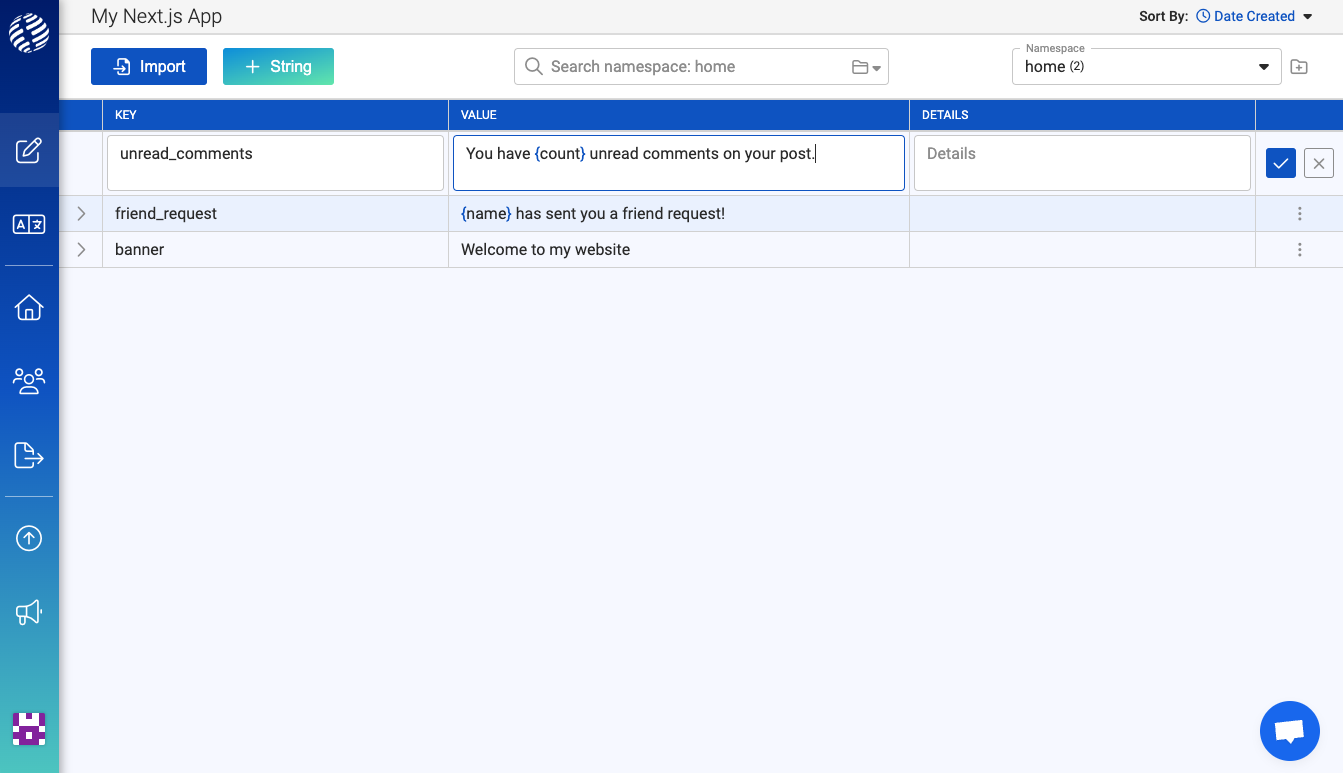
First let’s take a look at interpolation. Interpolation is used when you need to render a dynamic value in a message. For example:
"{name} has sent you a friend request!"
To interpolate a dynamic value, we simply wrap a variable name with curly braces. This syntax is based on ICU Message Format which is used by react-intl.
Let’s add this string to i18nexus:
And then let’s render it in our home page:
pages/index.js...
return (
<IntlProvider messages={messages} locale={locale}>
<Head>
<title>Create Next App</title>
<meta name="description" content="Generated by create next app" />
<meta name="viewport" content="width=device-width, initial-scale=1" />
<link rel="icon" href="/favicon.ico" />
</Head>
<main className={styles.main}>
<h1>
<FormattedMessage id="banner" />
</h1>
<h2>
<FormattedMessage id="friend_request" values={{ name: 'Steve' }} />
</h2>
</main>
</IntlProvider>
);
...The only difference in this FormattedMessage is that we need to include the values prop to pass in the dynamic value.
Let’s take a look at our app in English:

Perfect! As we can see, {name} was replaced with "Steve".
Pluralization
Oftentimes we will need to format a string that will need to have plural forms. Take the following example:
"You have have {count} unread comments on your post."
If the count is 1, we don’t want to say "1 unread comments". We need to have a singular and plural form based on the count.
The react-intl library handles this for us, but we need a specially formatted message:
"{count, plural, one { You have have one unread comment on your post. } other { You have have # unread comments on your post. } }"
Yuck!
On top of having to write this inconvenient syntax, some languages have more than 2 plural forms that we have to worry about! And some languages, like Japanese, only have one form.
Fortunately, i18nexus handles all of this for us. We don’t need to worry about writing this plural syntax or worry about knowing what plural forms are needed for each language!
Phew!
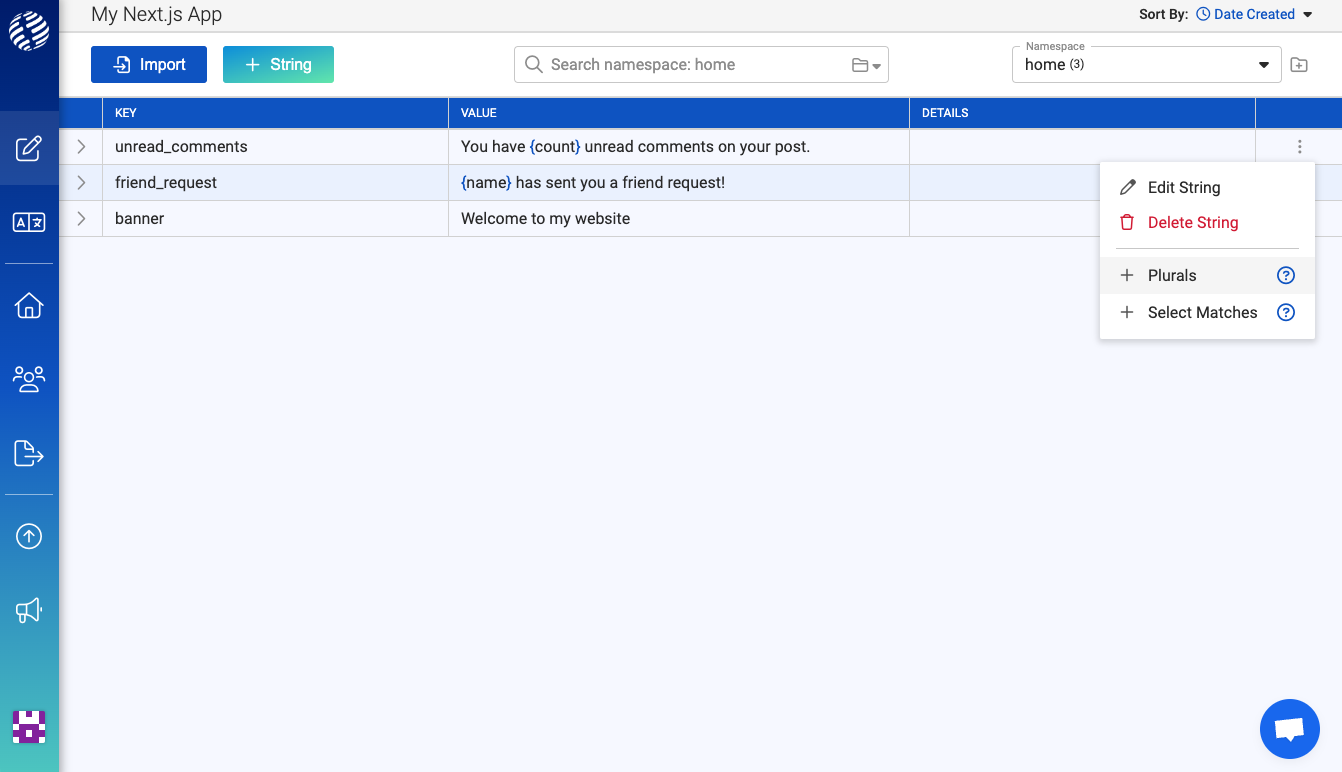
Let’s add the above plural message to i18nexus:
On the right side of the row, we can open the menu to add pluralization to this string:
This will split the string into 2 rows. One for the singular form (one) and one for the plural form (other). Let’s update the singular form to be grammatically correct:
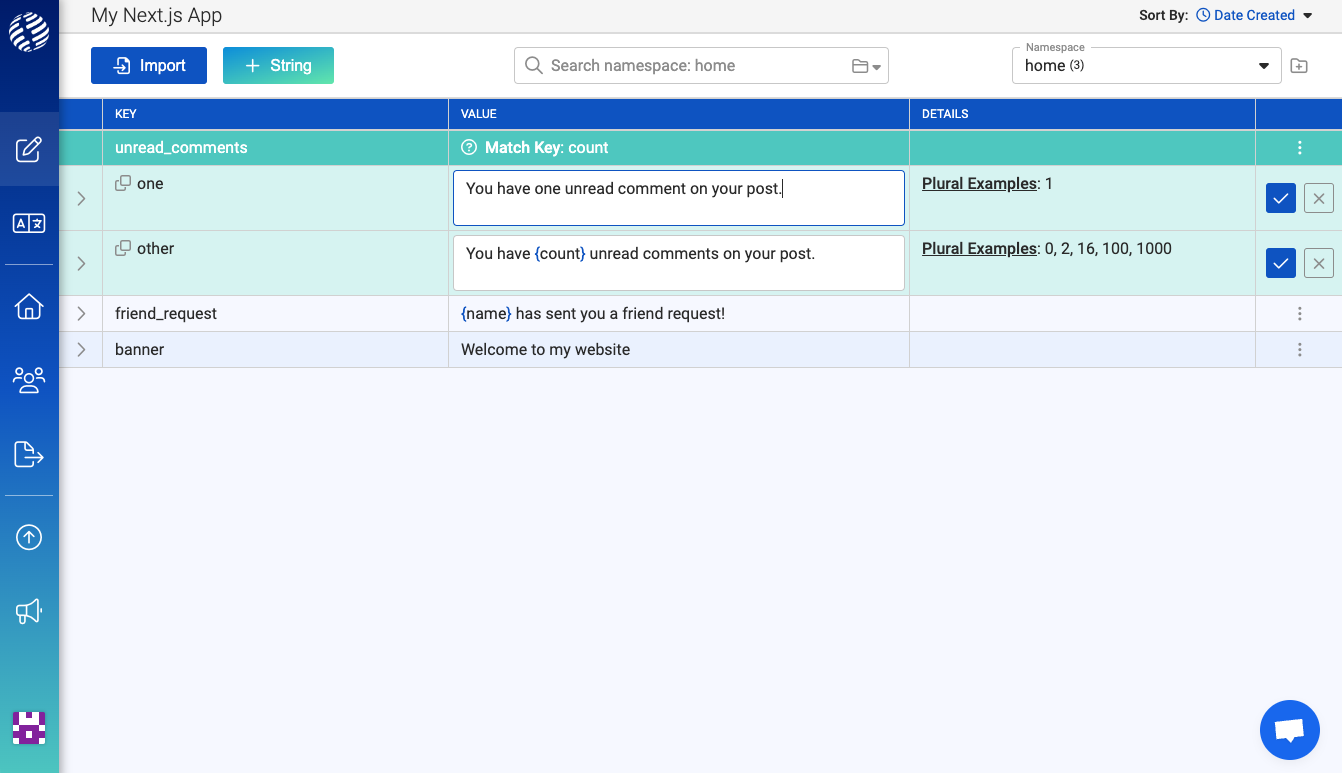
Nice!
A language can have a maximum of 6 plural forms: “zero”, “one”, “two”, “few”, “many”, and “other”. An example of a language that has all 6 is Arabic.
i18nexus auto-magically creates only the necessary translations for each language in your project. For example, you’ll notice that there is no Japanese translation for the “one” form:
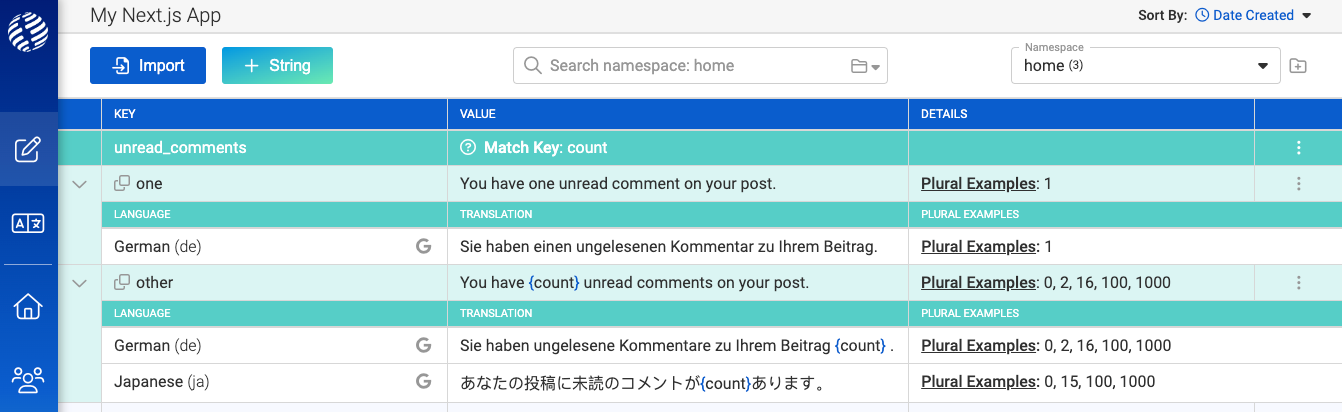
This is because Japanese only has one form, other. When you get to the stage of inviting professional translators to edit and confirm translations, i18nexus will show your German translator 2 forms to translate and your Japanese translator only one.
Imagine doing this without i18nexus… 🫠
Let’s go ahead and render our new plural message in our page:
pages/index.js...
return (
<IntlProvider messages={messages} locale={locale}>
<Head>
<title>Create Next App</title>
<meta name="description" content="Generated by create next app" />
<meta name="viewport" content="width=device-width, initial-scale=1" />
<link rel="icon" href="/favicon.ico" />
</Head>
<main className={styles.main}>
<h1>
<FormattedMessage id="banner" />
</h1>
<h2>
<FormattedMessage id="friend_request" values={{ name: 'Steve' }} />
</h2>
<h2>
<FormattedMessage id="unread_comments" values={{ count: 1 }} />
</h2>
</main>
</IntlProvider>
);
...This is what is rendered to the screen:

Let’s change the count to 5:

Amazing!
Level up your localization
It only takes a few minutes to streamline your translations forever.
Get started