Next.js 16 App Router with i18next - Step-by-Step Guide

A Next.js i18n guide for setting up react-i18next with the App Router
(6 minute read)
Last updated: June 2026
Available Next.js i18n Tutorials:
Which library should I choose? Compare them: next-i18next vs next-intl, react-i18next vs react-intl, next-i18next vs react-intl
Update: March 31, 2026
Check out our updated next-i18next App Router tutorial.
When this tutorial was originally written, next-i18next only supported the Pages Router, so the i18next maintainers recommended react-i18next for App Router projects. If you want to keep using react-i18next, this tutorial is still perfectly valid. But v16 of next-i18next adds App Router support, and for new Next.js projects it is now worth considering.
i18next + Next 16 App Router
In this tutorial we’re going to walk through setting up react-i18next with the Next.js App Router.
Reminder: Now that next-i18next supports the App Router, we also have a dedicated tutorial for that right here.
Even with next-i18next now supporting the App Router, react-i18next is still a flexible option if you want to work directly with i18next in your Next.js app.
We’ll cover internationalized routing, loading translations in Server and Client Components, and connecting the whole thing to i18nexus for translation management.
Let’s get started!
Project Set Up
I’ve gone ahead and generated a basic Next.js app that uses the App Router using:
$ npx create-next-app@latest
I’ve simplified the Home page to look like this:
app/page.jsimport styles from './page.module.css';
import ExampleClientComponent from '@/components/ExampleClientComponent';
export default async function Home() {
return (
<main className={styles.main}>
<h1>Welcome to my home page</h1>
<ExampleClientComponent />
</main>
);
}This page is a Server Component that imports a Client Component that I named ExampleClientComponent:
components/ExampleClientComponent.js'use client';
export default function ExampleClientComponent() {
return <p>Have a great day!</p>;
}And here is the result:

I bet you would love to see more of my beautiful UI designs! 😉
Dependencies
$ npm install i18next react-i18next i18next-resources-to-backend next-i18n-router
First, we’re installing both react-i18next and its base library i18next.
To assist with loading translations server side, we will use the i18next-resources-to-backend add-on.
Lastly, next-i18n-router is a lightweight package to implement internationalized routing and locale detection specifically in App Router projects. It is a recommended resource in Next’s App Router docs since Next’s built-in internationalized routing feature was removed in the App Router.
Internationalized Routing
Before we get started with setting up i18next, we’re going to set up next-i18n-router.
next-i18n-router will prefix all of our paths with the current locale, except for our default locale which will still be available at the base path with no prefix.
For example, if I have a page at /about , the paths would appear like so:
English: example.com/about
French: example.com/fr/about
Italian: example.com/it/about
Setup requires 3 steps:
1) Create a config
Add a file at the root of your project called i18nConfig.js.
i18nConfig.jsconst i18nConfig = {
locales: ['en', 'fr', 'it'],
defaultLocale: 'en'
};
module.exports = i18nConfig;The locales property is an array of languages we want our app to support.
The defaultLocale property is the language that visitors will fall back to if our app does not support their language.
2) Set up a dynamic segment
Second, we need to add a dynamic segment inside our /app directory to contain all pages and layouts. I’ll name mine [locale]:
└── app

    └── [locale]

        ├── layout.js

        └── page.js
3) Create proxy
Finally, at the root of your project add a proxy.js file.
If you are using a /src directory, it should be inside of /src.
Note: If you are using Next.js 15 or earlier, this file is named middleware.js.
proxy.jsimport { i18nRouter } from 'next-i18n-router';
import i18nConfig from './i18nConfig';
// name this function 'middleware' instead in Next 15 or earlier
export function proxy(request) {
return i18nRouter(request, i18nConfig);
}
// runs this function only on requests to pages in our app directory
export const config = {
matcher: '/((?!api|static|.*\\..*|_next).*)'
};This is where the magic happens 🔮
The i18nRouter function will take the request, detect the user’s preferred language using the accept-language header, and then redirect them to the path with their preferred language. If we don’t support their language, it will fallback to the default language.
next-i18n-router also lets you customize the detection logic if you wish.
Awesome!
After restarting our server, we can now visit our home page successfully at /, /fr, and /it.
Our internationalized routes are ready to go! Now let’s set up i18next to render translations based on the current language.
react-i18next
To set up react-i18next, let’s first create some files for our translations.
We could do this the old-fashioned way by manually creating a bunch of JSON files for each page and language. But we're of course going to use i18nexus to AI translate and generate our JSON files for us!
Not only do we get immediate AI translations, but when your team is ready to hire professional translators, you can just invite them to your project instead of emailing JSON files.
By the end of this tutorial, our app will be fully translated:
Initializing the project
If you don’t already have an i18nexus account, you can sign up for a free account here.
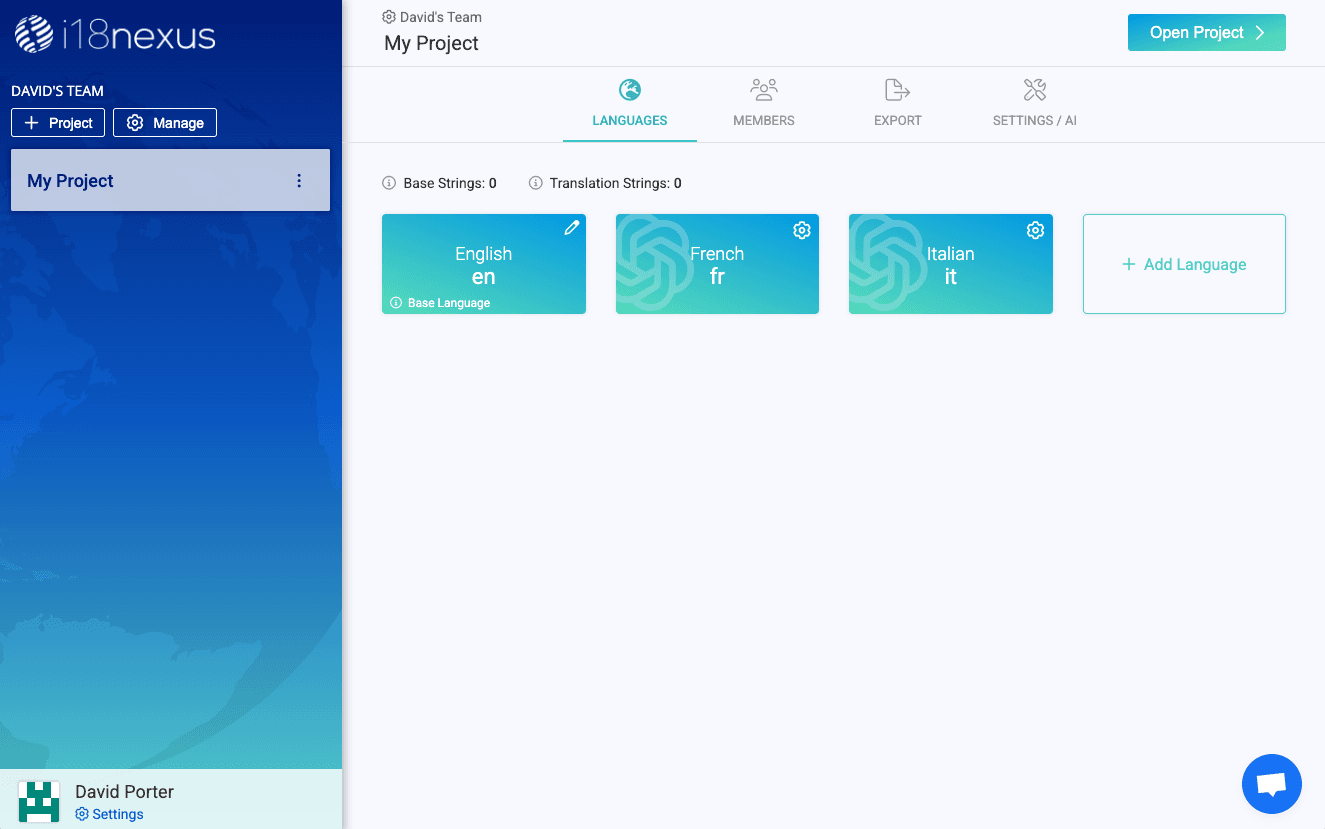
After creating a new i18nexus project, add your supported languages. In my case, I’m supporting English, French, and Italian:
Next, we’ll click Open Project in the top right corner of the page. After clicking the Add String button, we see three fields:

The Key is what is used to reference this string in our code.
The Value is the text that will be rendered to the end user.
The Team Notes field is optional and meant to provide any internal notes about this string if you’re working with other team members or translators.
The AI Note button allows us to add any custom instructions or context about this value to help our AI translator provide more accurate translations! 🦾
Adding Strings
Our homepage has a header that says “Welcome to my home page”. I’m going to add this string with a key named “header”
Our home page also has text that says “Have a great day!”. I’m going to add a string for this text with a key named “greeting”:
After adding the strings, we can expand the rows to see that they have automatically been AI translated to our other languages using OpenAI:
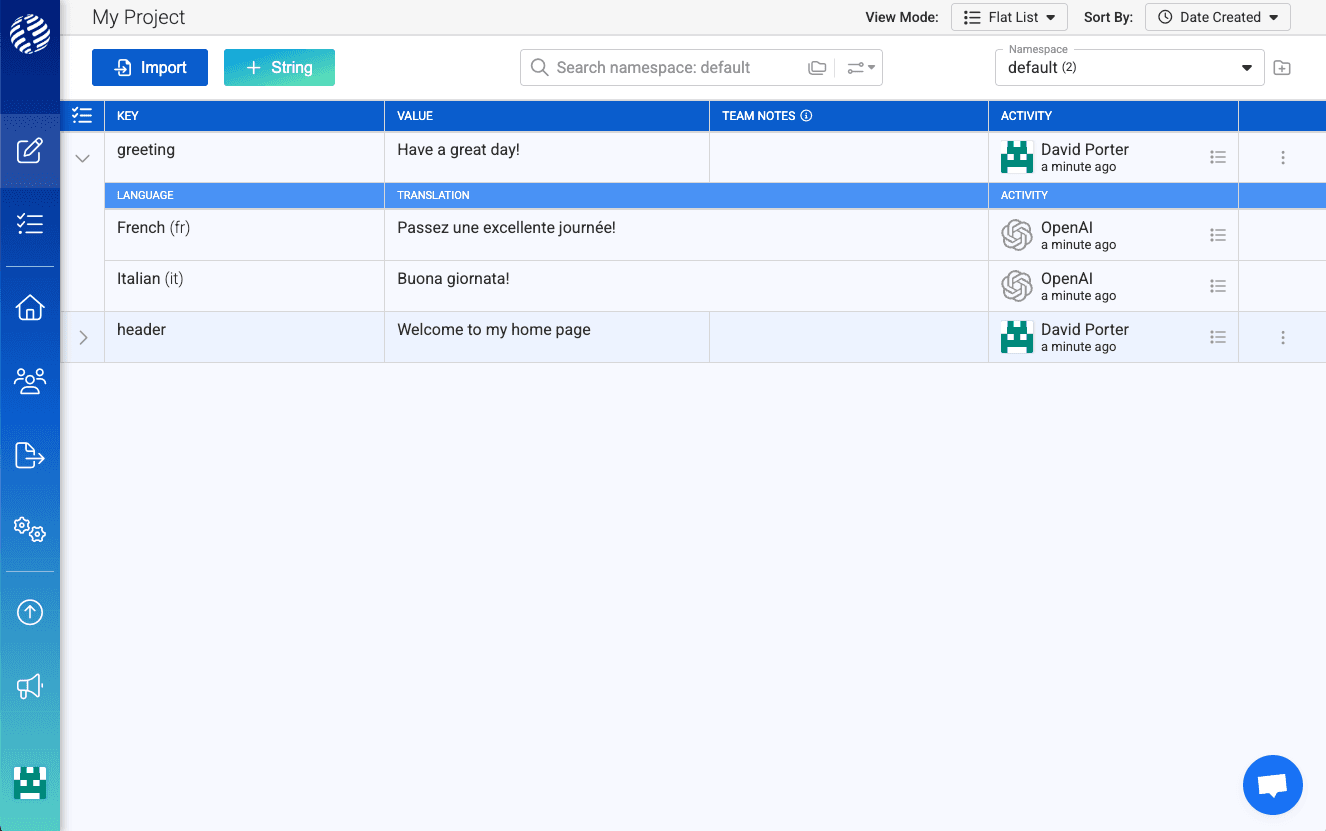
Sweet! 🔥
i18nexus also has a VSCode extension that allows you to add strings to your project straight from your editor!

Namespaces
When using the App Router with i18next, it is good practice to namespace our strings per page. This way we don’t need to load all of the strings for our entire app when viewing one page, we can just load one page’s strings at a time.
In the top right corner of the page in i18nexus, we can see we are currently in a namespace called “default”. Let’s rename this namespace to “home” to use on our home page:

Connecting to our app
Now let’s get these translations into our app! To do this we will use the @i18nexus/cli package:
$ npm install @i18nexus/cli -g
Next, grab your i18nexus API key from the Settings page and add it as an environment variable in your project. I’m going to add it to my .env file:
I18NEXUS_API_KEY="my_api_key"
Now in our project directory we can run $ i18nexus pull. We should see all of our translations as JSON files at the root of our project in a folder named locales.
But... we don't want to have to run the pull command manually everytime we add or update strings in i18nexus!
In development we can run the listen command to have our local environment automatically pull whenever changes are made in i18nexus. ⚡️
$ i18nexus listen
For convenience, let's update our package.json to automatically pull our strings when building, and listen whenever we run our dev server:
package.json...
"scripts": {
"dev": "concurrently \"next dev\" \"i18nexus listen\"",
"build": "i18nexus pull && next build",
"start": "i18nexus pull && next start",
"lint": "next lint"
},
...Note: If you do this you should also add @i18nexus/cli and concurrently as dev dependencies to ensure it works in all environments:
$ npm install @i18nexus/cli concurrently --save-dev
Our translations are ready to go! 🚀
Loading and Rendering Translations
With the App Router, we need to support rendering translations in both Server Components and Client Components.
Server Components with react-i18next:
I’m going to create a file in my /app directory called i18n.js that contains a function to generate an i18next instance:
app/i18n.jsimport { createInstance } from 'i18next';
import { initReactI18next } from 'react-i18next/initReactI18next';
import resourcesToBackend from 'i18next-resources-to-backend';
import i18nConfig from '@/i18nConfig';
export default async function initTranslations(
locale,
namespaces,
i18nInstance,
resources
) {
i18nInstance = i18nInstance || createInstance();
i18nInstance.use(initReactI18next);
if (!resources) {
i18nInstance.use(
resourcesToBackend(
(language, namespace) =>
import(`@/locales/${language}/${namespace}.json`)
)
);
}
await i18nInstance.init({
lng: locale,
resources,
fallbackLng: i18nConfig.defaultLocale,
supportedLngs: i18nConfig.locales,
defaultNS: namespaces[0],
fallbackNS: namespaces[0],
ns: namespaces,
preload: resources ? [] : i18nConfig.locales
});
return {
i18n: i18nInstance,
resources: { [locale]: i18nInstance.services.resourceStore.data[locale] },
t: i18nInstance.t
};
}
We can now use this function to generate an i18next instance that will translate text on our home page:
app/[locale]/page.jsimport styles from './page.module.css';
import ExampleClientComponent from '@/components/ExampleClientComponent';
import initTranslations from '../i18n';
export default async function Home({ params: { locale } }) {
const { t } = await initTranslations(locale, ['home']);
return (
<main className={styles.main}>
<h1>{t('header')}</h1>
<ExampleClientComponent />
</main>
);
}In our page, we are reading the locale from our params and passing it into initTranslations. We are also passing in an array of all of the namespaces required for this page. In our case, we just have the one namespace called “home”.
We then call the t function with the key of the string we want to render.
Let’s go to /it and take a look at our header in Italian!

That was easy! ⚡️
If we want to use more than one namespace on this page, we just include them in the array passed into initTranslations. The first namespace in the array is set to be our default namespace.
Note: To translate a key of another namespace on the same page, you must include the namespace name and a colon with the key like so: t("secondary-namespace:hello-world")
Let’s move on to translate the text in our Client Component.
Client Components with react-i18next:
To make our translations available to all the Client Components on the page, we’re going to use a provider. I’m going to create a new file with a component called TranslationsProvider in components/TranslationsProvider.js:
components/TranslationsProvider.js'use client';
import { I18nextProvider } from 'react-i18next';
import initTranslations from '@/app/i18n';
import { createInstance } from 'i18next';
export default function TranslationsProvider({
children,
locale,
namespaces,
resources
}) {
const i18n = createInstance();
initTranslations(locale, namespaces, i18n, resources);
return <I18nextProvider i18n={i18n}>{children}</I18nextProvider>;
}
This provider is a Client Component that creates an i18next instance on the client and uses the I18nextProvider to provide the instance to all descendent Client Components.
We only need to use the provider once per page. Let’s add it to our home page:
app/[locale]/page.jsimport initTranslations from '../i18n';
import styles from './page.module.css';
import ExampleClientComponent from '@/components/ExampleClientComponent';
import TranslationsProvider from '@/components/TranslationsProvider';
const i18nNamespaces = ['home'];
export default async function Home({ params: { locale } }) {
const { t, resources } = await initTranslations(locale, i18nNamespaces);
return (
<TranslationsProvider
namespaces={i18nNamespaces}
locale={locale}
resources={resources}>
<main className={styles.main}>
<h1>{t('header')}</h1>
<ExampleClientComponent />
</main>
</TranslationsProvider>
);
}
Don't worry, even though we’re wrapping our page with this Client Component, our page is still rendered as a Server Component.
useTranslation Hook
Now that our page has this provider wrapped around it, we can use react-i18next in our Client Components the same way we would use it in any React app.
If you haven’t used react-i18next before, the way that we render translations is by using a hook named useTranslation.
Let’s use it in our ExampleClientComponent:
components/ExampleClientComponent.js'use client';
import { useTranslation } from 'react-i18next';
export default function ExampleClientComponent() {
const { t } = useTranslation();
return <h3>{t('greeting')}</h3>;
}Just like with our initTranslations function, we call the t function with our string's key.
Let’s take a look at our page in Italian again:

We now have a fully internationalized app! 🎉
Changing Languages
The next-i18n-router does a good job of detecting a visitor’s preferred language, but oftentimes we want to allow our visitors to change the language themselves.
To do this, we will create a dropdown for our user to select their new language. We will take their selected locale and set it as a cookie named "NEXT_LOCALE" that next-i18n-router uses to override the automatic locale detection.
I’m going to create a new component called LanguageChanger:
components/LanguageChanger.js'use client';
import { useRouter } from 'next/navigation';
import { usePathname } from 'next/navigation';
import { useTranslation } from 'react-i18next';
import i18nConfig from '@/i18nConfig';
export default function LanguageChanger() {
const { i18n } = useTranslation();
const currentLocale = i18n.language;
const router = useRouter();
const currentPathname = usePathname();
const handleChange = e => {
const newLocale = e.target.value;
// set cookie for next-i18n-router
const days = 30;
const date = new Date();
date.setTime(date.getTime() + days * 24 * 60 * 60 * 1000);
const expires = date.toUTCString();
document.cookie = `NEXT_LOCALE=${newLocale};expires=${expires};path=/`;
// redirect to the new locale path
if (
currentLocale === i18nConfig.defaultLocale &&
!i18nConfig.prefixDefault
) {
router.push('/' + newLocale + currentPathname);
} else {
router.push(
currentPathname.replace(`/${currentLocale}`, `/${newLocale}`)
);
}
router.refresh();
};
return (
<select onChange={handleChange} value={currentLocale}>
<option value="en">English</option>
<option value="it">Italian</option>
<option value="fr">French</option>
</select>
);
}Let’s add the LanguageChanger below our ExampleClientComponent and try it out:
Perfect! Or should I say “Perfetto!”
Using SSG
Lastly, let’s update our layout.js. We’ll use generateStaticParams so that Next.js statically generates pages for each of our languages. We’ll also make sure to add the current locale to the <html> tag of our app.
app/[locale]/layout.jsimport './globals.css';
import { Inter } from 'next/font/google';
import i18nConfig from '@/i18nConfig';
import { dir } from 'i18next';
const inter = Inter({ subsets: ['latin'] });
export const metadata = {
title: 'Create Next App',
description: 'Generated by create next app'
};
export function generateStaticParams() {
return i18nConfig.locales.map(locale => ({ locale }));
}
export default function RootLayout({ children, params: { locale } }) {
return (
<html lang={locale} dir={dir(locale)}>
<body className={inter.className}>{children}</body>
</html>
);
}We’re ready for production! 🙂
Wrapping it up
Setting up react-i18next with the App Router is quite a bit different than setting it up with a regular CSR React app or with the Pages Router. But after the initial configuration, you will find development isn’t all that different.
There are definitely other strategies for setting up react-i18next with the App Router, but we found this strategy both efficient and the most developer-friendly.
Happy internationalizing! 🌎
Level up your localization
It only takes a few minutes to streamline your translations forever.
Get started