Next.js 16 - Setting Up next-intl + AI Pre-Translation

A step-by-step guide for setting up next-intl with Next.js 16
(7 minute read)
Last updated: June 2026
Available Next.js i18n Tutorials:
Which library should I choose? Compare them: next-i18next vs next-intl, react-i18next vs react-intl, next-i18next vs react-intl
Why use next-intl?
Since the App Router dropped support for internationalized routing, next-intl has become the go-to solution for Next.js 16. It not only restores routing, but also gives us a complete workflow for loading and rendering translations. We'll even take it further by using i18nexus to automatically pre-translate strings with AI!
Let’s Get Started
I’ve created a new Next.js App Router project using:
$ npx create-next-app@latest
Before we start up our dev server, let’s install next-intl:
$ npm install next-intl
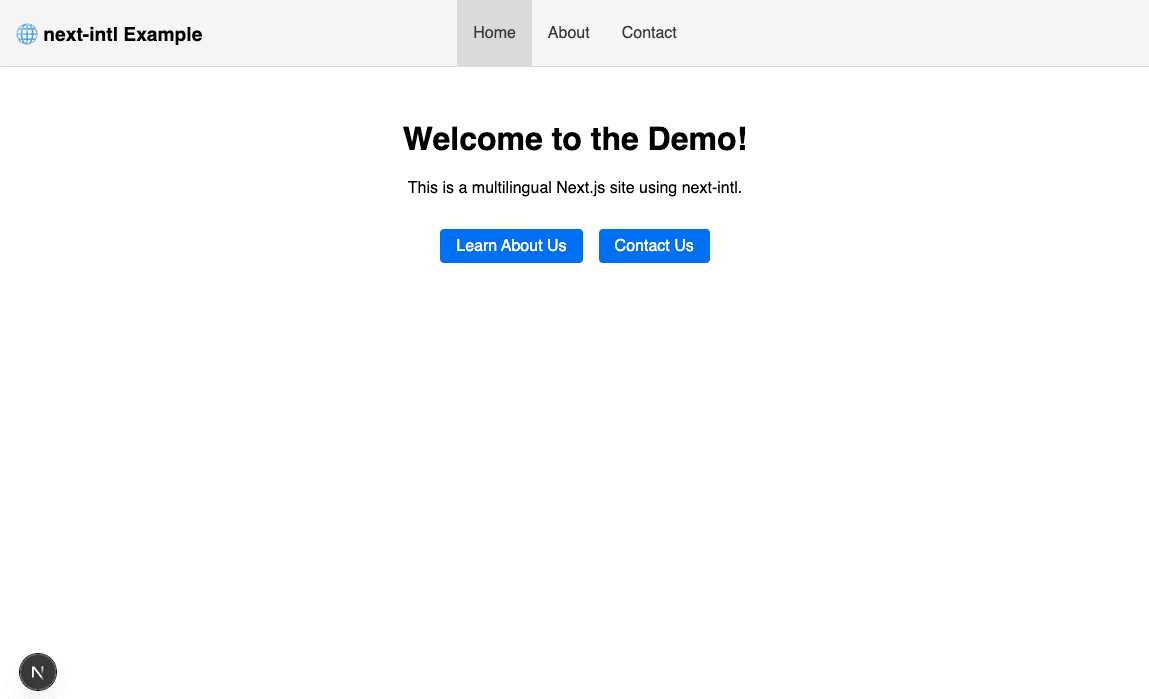
I’ve removed the default homepage content and replaced it with my own simple home page:
app/page.tsximport Link from 'next/link'
import styles from './home.module.css';
export default function Home() {
return (
<div className={styles.container}>
<h1>Welcome to the Demo!</h1>
<p>This is a multilingual Next.js site using next-intl.</p>
<div className={styles.links}>
<Link href="/about" className={styles.link}>
Learn About Us
</Link>
<Link href="/contact" className={styles.link}>
Contact Us
</Link>
</div>
</div>
);
}Here's a preview of what my site looks like:
I also added a simple Navbar component to my layout. With that done, let’s internationalize! 🌎
Initial Setup
To support next-intl's routing behavior, we will need to make a small change to our app directory structure. Add a directory named [locale] to contain all pages and layouts inside your app directory:
└── app

    └── [locale]

        ├── layout.tsx

        └── page.tsx
In this case, the [locale] directory is a dynamic segment that will allow us to access the current locale in our pages via params.
Next we will update our next.config.ts to integrate the createNextIntlPlugin:
next.config.tsimport { NextConfig } from 'next';
import createNextIntlPlugin from 'next-intl/plugin';
const nextConfig: NextConfig = {};
const withNextIntl = createNextIntlPlugin();
export default withNextIntl(nextConfig);Lastly, we'll create a directory at the root of our project called i18n to our hold next-intl configuration files. If you're using a src directory, put it in src.
In this directory, create a file named routing.ts which will define what locales we want our app to support. Let's support English (en), German (de), and Italian (it):
i18n/routing.tsimport {defineRouting} from 'next-intl/routing';
export const routing = defineRouting({
locales: ['en', 'de', 'it'],
defaultLocale: 'en'
});The default locale will be used as a fallback when no locale matches.
In our RootLayout component, we will read this routing configuration to ensure that any requests with unsupported locales return a 404 response. We will also use it to generateStaticParams for our locale paths so that routes can be rendered at build time ⚡️.
app/[locale]/layout.tsximport {NextIntlClientProvider, hasLocale} from 'next-intl';
import {notFound} from 'next/navigation';
import {routing} from '@/i18n/routing';
import Navbar from '@/components/Navbar';
export function generateStaticParams() {
return routing.locales.map((locale) => ({locale}));
}
export default async function RootLayout({
children,
params
}: {
children: React.ReactNode;
params: Promise<{locale: string}>;
}) {
const {locale} = await params;
if (!hasLocale(routing.locales, locale)) {
notFound();
}
return (
<html lang={locale}>
<body>
<NextIntlClientProvider>
<Navbar />
{children}
</NextIntlClientProvider>
</body>
</html>
);
}Here we will also integrate the NextIntlClientProvider to allow next-intl functionality in Client Components.
Navigation with next-intl
Now that we have all our configuration set up for routing, we can add next-intl's navigation APIs. In our i18n directory, we'll add a file named navigation.ts:
i18n/navigation.tsimport { createNavigation } from 'next-intl/navigation';
import { routing } from './routing';
export const { Link, redirect, usePathname, useRouter, getPathname } =
createNavigation(routing);This file simply exports i18n-friendly wrappers around Next's navigation APIs to be used in our components.
Handling Requests
To handle requests, we need to create a proxy.ts file at the root of our project that initializes next-intl's middleware. Again, if you're using a src directory, put it in src.
Note: The proxy.ts file used to be named middleware.ts in Next 15 and eariler. Be sure to use the correct file name based on your version of Next.
proxy.tsimport createMiddleware from 'next-intl/middleware';
import {routing} from './i18n/routing';
export default createMiddleware(routing);
export const config = {
matcher: '/((?!api|trpc|_next|_vercel|.*\\..*).*)'
}Here we call next-intl's createMiddleware with our routing configuration to allow next-intl to properly handle i18n navigation.
If you're unfamiliar with the proxy.ts file, it is a feature of NextJS and not specific to next-intl. It allows us to run code on the server before a request is completed. Learn more here.
And for one FINAL piece of next-intl configuration, we need to add a request.ts file in our i18n directory:
i18n/request.tsimport {getRequestConfig} from 'next-intl/server';
import {hasLocale} from 'next-intl';
import {routing} from './routing';
export default getRequestConfig(async ({requestLocale}) => {
const requested = await requestLocale;
const locale = hasLocale(routing.locales, requested)
? requested
: routing.defaultLocale;
return {
locale,
messages: (await import(`../messages/${locale}.json`)).default
};
});The getRequestConfig function is used by next-intl to provide messages and other features to Server Components in our app.
And with that, we are done with configuration. 🎉
Handling Messages
In next-intl, every string displayed in your app is called a message.
If you’ve worked with internationalization before, you know the pain of wrangling massive JSON files for every single language. It’s tedious, time-consuming, and error-prone.
And worse... until you pay professional translators, you’re left guessing what your app even looks like in other languages.
Fortunately, AI can now do the heavy lifting. With i18nexus, we can manage all our messages in one place and have them automatically translated by OpenAI. When we're ready, we can invite professional translators to review and refine our translations right from the i18nexus dashboard.
The result? A faster workflow, live previews in every language, and no more giant JSON pains.
We will have a fully translated app by the end of this tutorial:
Adding Messages
If you haven't used i18nexus before, create a free account and select next-intl for your project’s library. In my project, I’ll click Add Language to add all of the languages that we listed earlier in our i18n/routing.ts file:

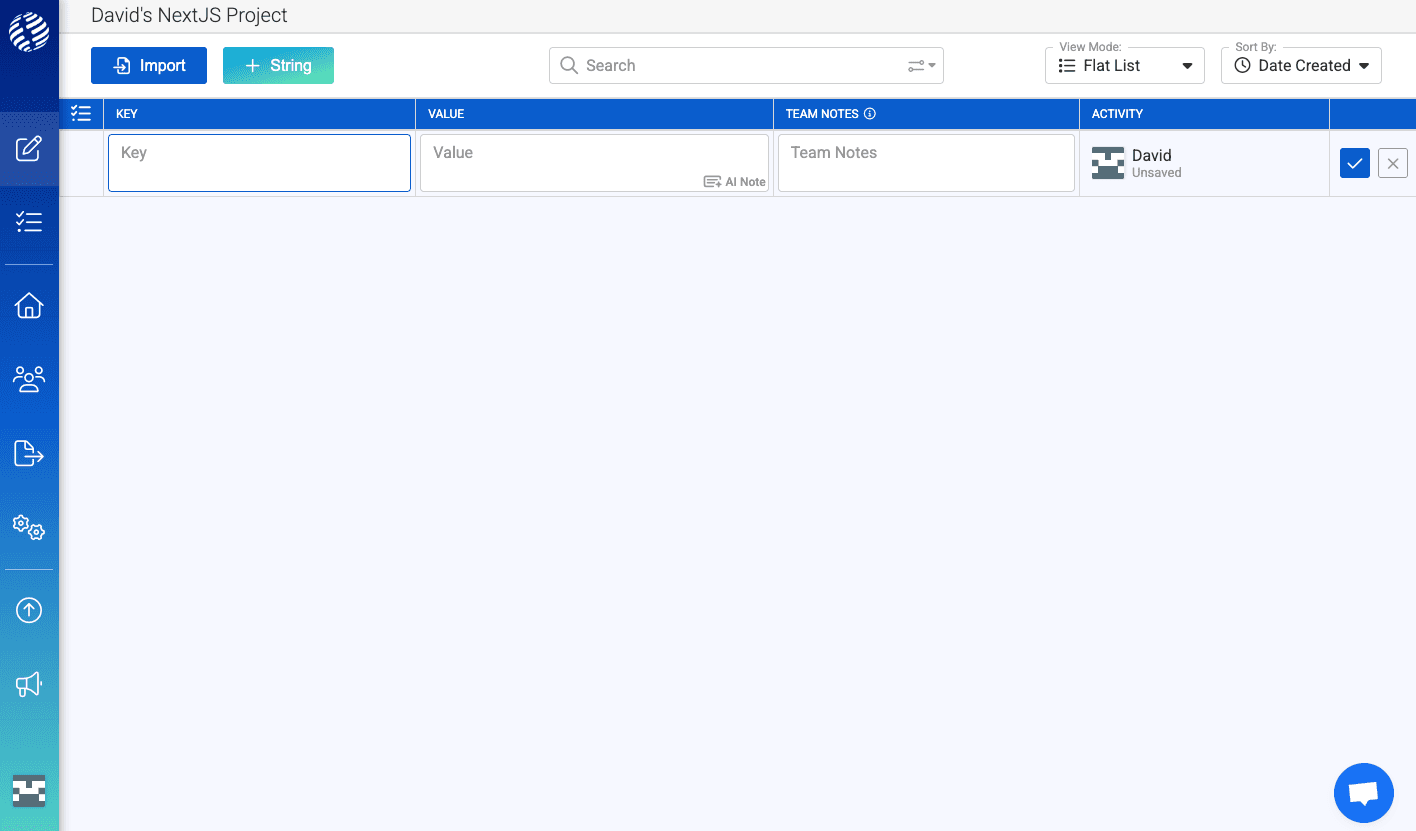
Now we’ll click Open Project in the top right corner of the page and then click Add String to add our first string:
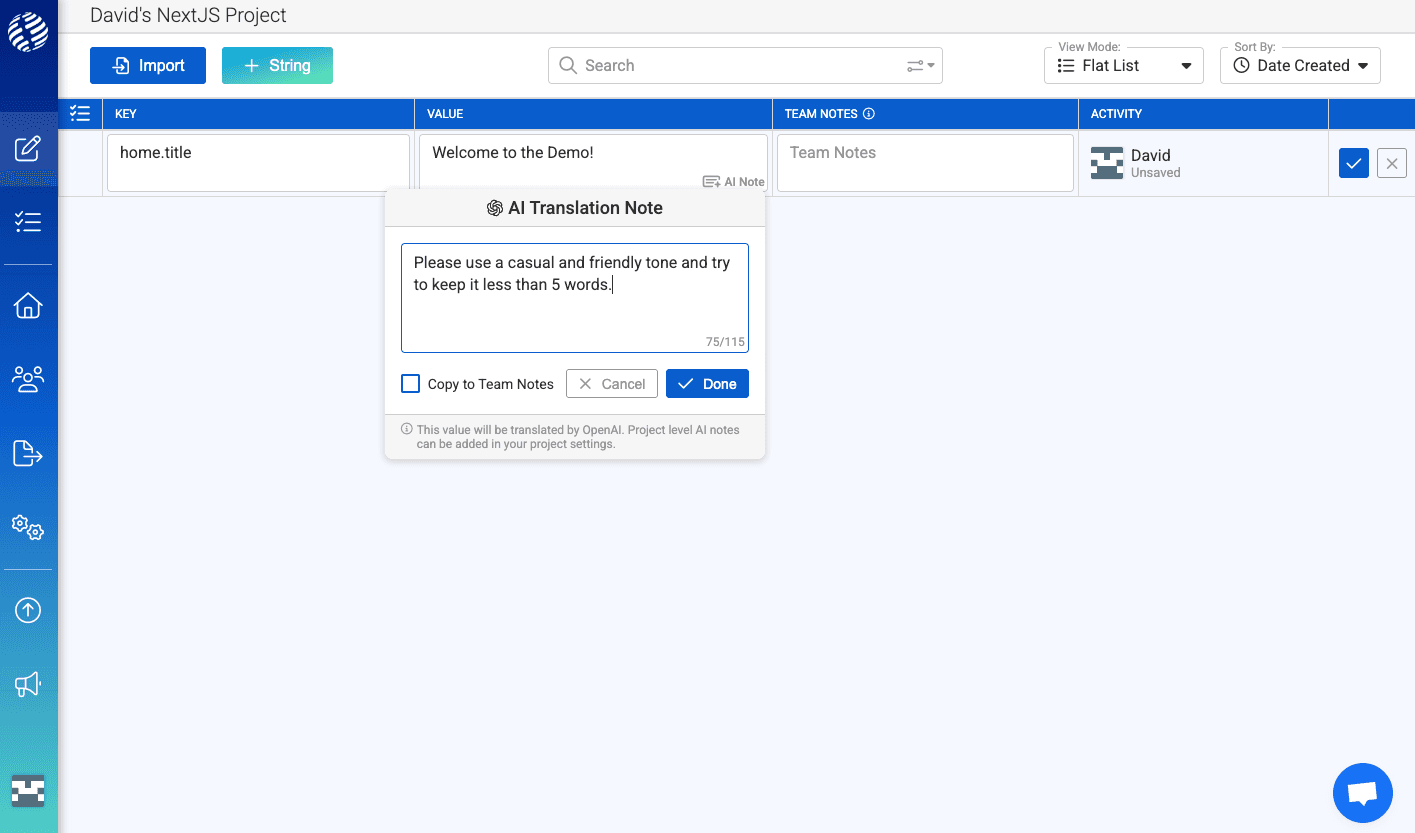
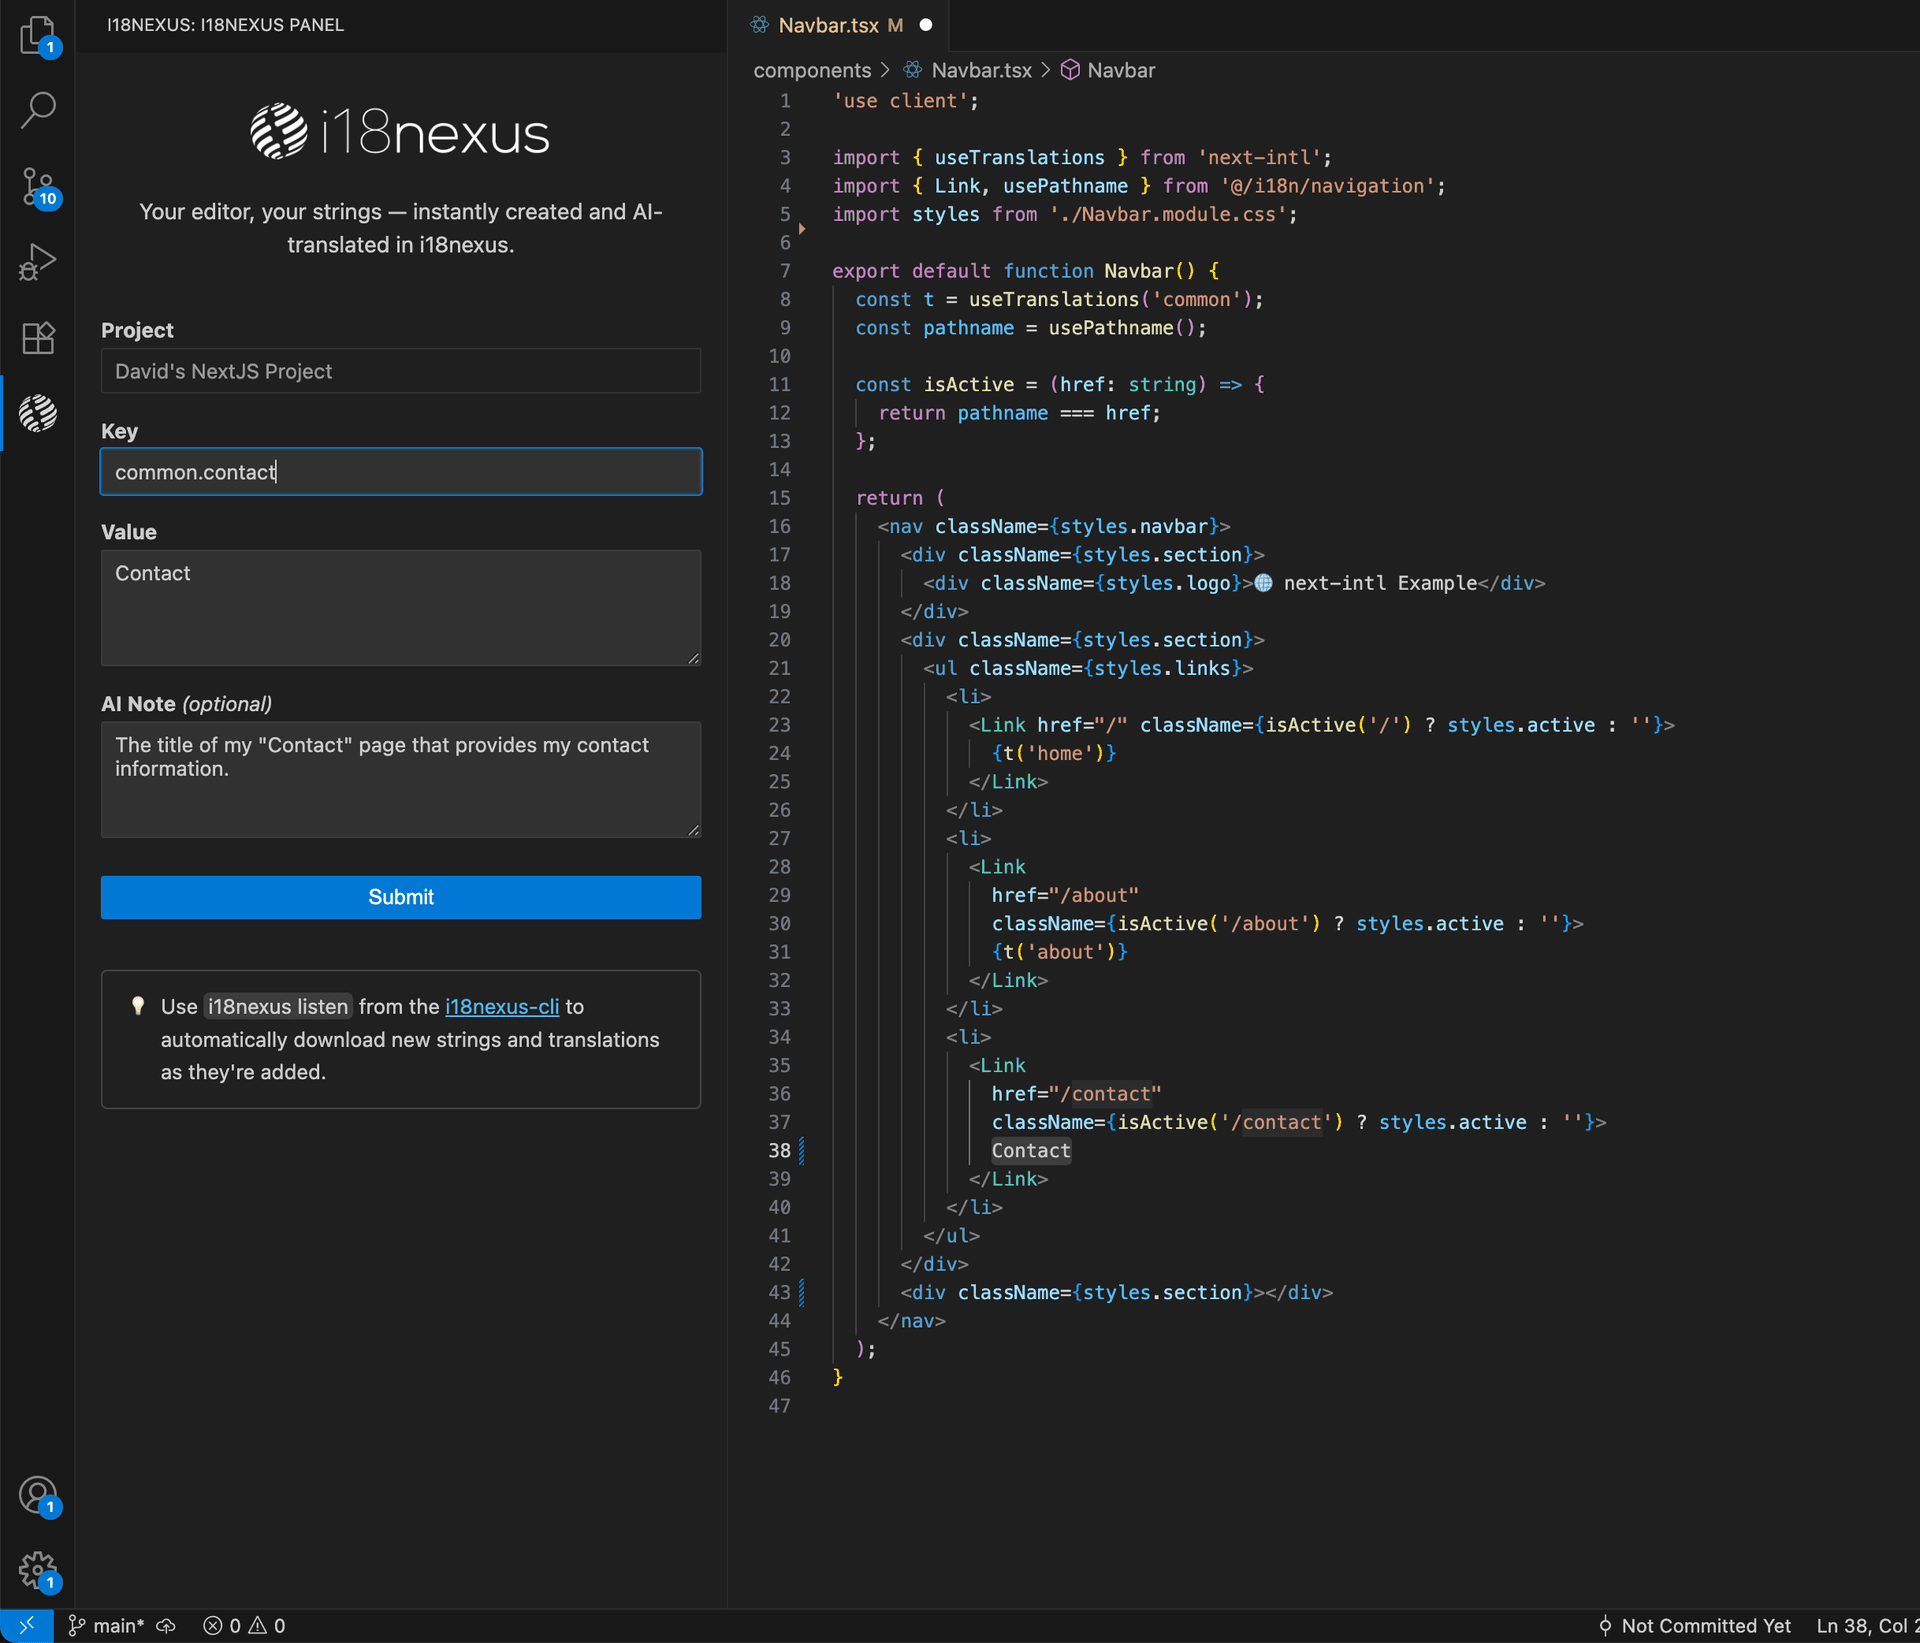
The first string I'll add is the title that appears on the top of my homepage: "Welcome to the Demo!"
The string key is used to reference this string in our code. I will set my key to: "home.title". In next-intl, we can namespace our messages by using the "." character for better organization.
The value is what will be rendered to the end user: "Welcome to the Demo!"
The Team Notes field is optional and meant for for any notes you want to write about the the string for the rest of your team to reference.
By now you've noticed the AI Note button. This is an awesome feature of i18nexus that allows us to add any notes or instructions for the AI translator about this value. It's especially great for vague values or business jargon.
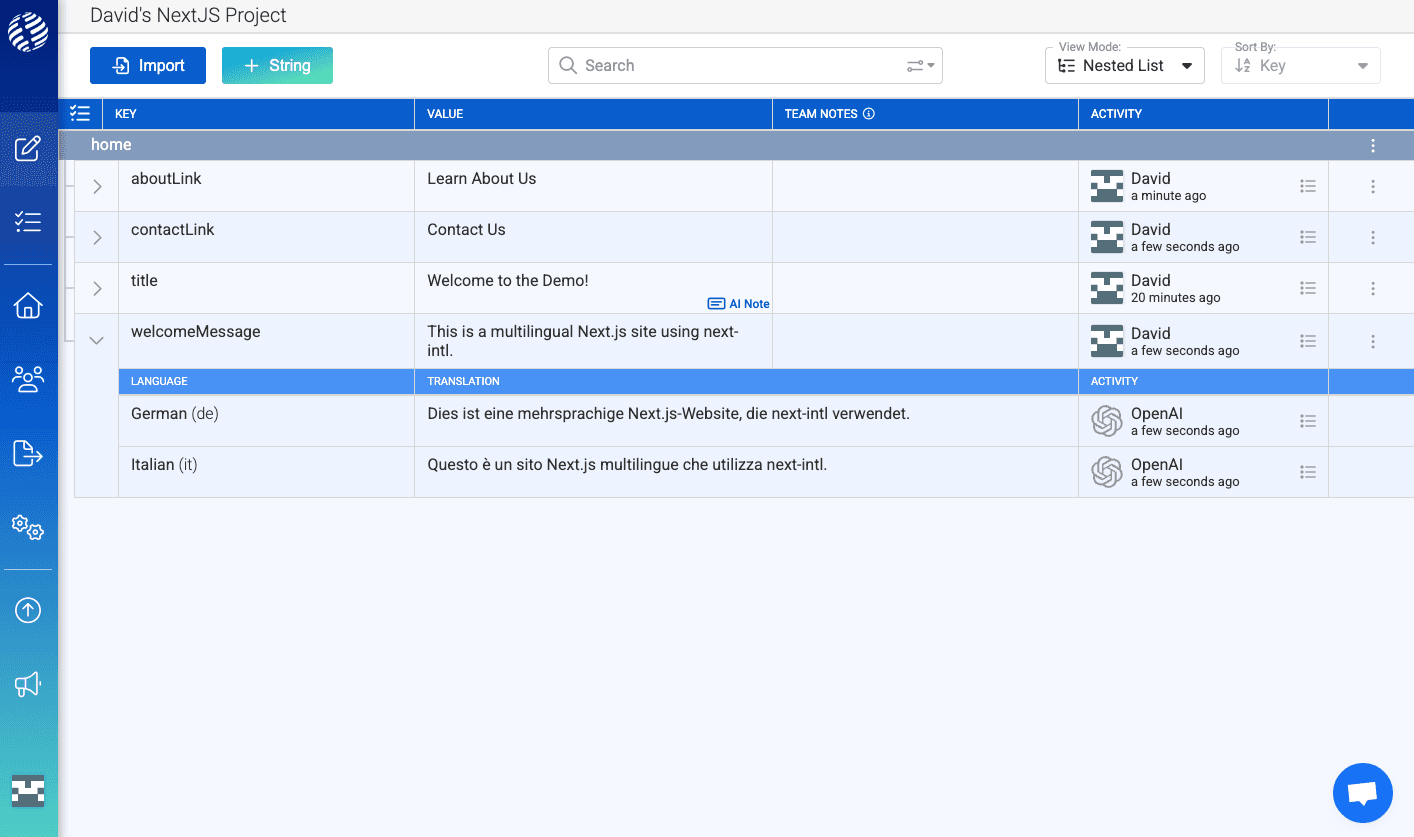
After saving, we can expand the row to see all of the generated AI translations for each of our languages:

Our translations are ready to go! 🚀
After adding the other strings that appear in my Home page component, let's change the i18nexus View Mode to Nested List. This gives us a nice JSON-like view of all our strings!
i18nexus knows that the "." character represents a nested namespace and generates the nested structure:
Awesome! 🔥
Loading Translations
Let's load up these translations!
We'll use the @i18nexus/cli package to connect our app to our i18nexus strings:
$ npm install @i18nexus/cli -g
In the the i18nexus project dashboard, go to the "Settings/AI" tab. Copy your project’s API key and add it as an environment variable in your Next.js project:
.envI18NEXUS_API_KEY="your_api_key"With the CLI installed, we can now run the pull command to download our translations straight to our project:
$ i18nexus pull
You should now see a directory named messages at the root of your project that contains a JSON file for each language, just as next-intl expects.
But... I don't want to have to run i18nexus pull every time I make a change in my i18nexus project...
Not a problem!
In development we can run i18nexus listen to have our translations download automatically any time our strings are added or updated in i18nexus.
If you want, update your package.json to pull your latest strings every time you build for production and use a library like concurrently to run i18nexus listen alongside your dev server:
package.json...
"scripts": {
"dev": "concurrently --raw \"next dev --turbo\" \"i18nexus listen\"",
"build": "i18nexus pull && next build",
"start": "i18nexus pull && next start",
"lint": "next lint"
},
...To ensure that the build works in all environments, it is smart to install @i18nexus/cli as a dev dependency as well:
$ npm install @i18nexus/cli --save-dev
Note: next-intl requires you to use --turbo in development if you want hot reload on changes in your messages directory.
Rendering Translations
To render a translation in our home page using next-intl, we use the useTranslations hook. This hook takes a namespace as an argument:
app/[locale]/page.tsx...
import { useTranslations } from 'next-intl';
export default function Home() {
const t = useTranslations('home');
...The t function now has access to all translations in our home namespace. In other words, any key that starts with "home.".
Now let’s use it to render our translations:
app/[locale]/page.tsximport { useTranslations } from 'next-intl';
import styles from './home.module.css';
import { Link } from '@/i18n/navigation';
import { use } from 'react';
import { setRequestLocale } from 'next-intl/server';
export default function HomePage({
params
}: {
params: Promise<{ locale: string }>;
}) {
const { locale } = use(params);
setRequestLocale(locale);
const t = useTranslations('home');
return (
<div className={styles.container}>
<h1>{t('title')}</h1>
<p>{t('welcomeMessage')}</p>
<div className={styles.links}>
<Link href="/about" className={styles.link}>
{t('aboutLink')}
</Link>
<Link href="/contact" className={styles.link}>
{t('contactLink')}
</Link>
</div>
</div>
);
}One thing to notice above is the line setRequestLocale(locale). This line needs to be present at the top of all page components. This line lets us access the locale param in all Server Components inside this page without us needing to prop-drill.
I'm now going to quickly update my Navbar component.
For my Navbar component, I'm going to add all the text as keys namespaced with "common.". It is convention to use the namespace "common" for strings that will likely appear on multiple pages.
If you don't want to keep jumping to the i18nexus web app to add new strings, you can also try using the i18nexus VSCode extension to quickly add new strings to your project from your editor! They will be automatically translated and stored in i18nexus as if you added them on the web app.
⚡️ We are now fully internationalized! ⚡️
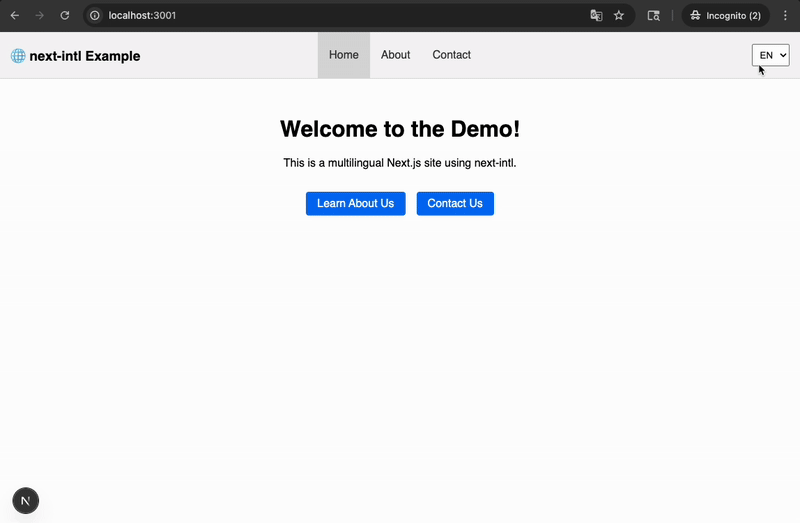
Let’s test by going to localhost:3000/de:
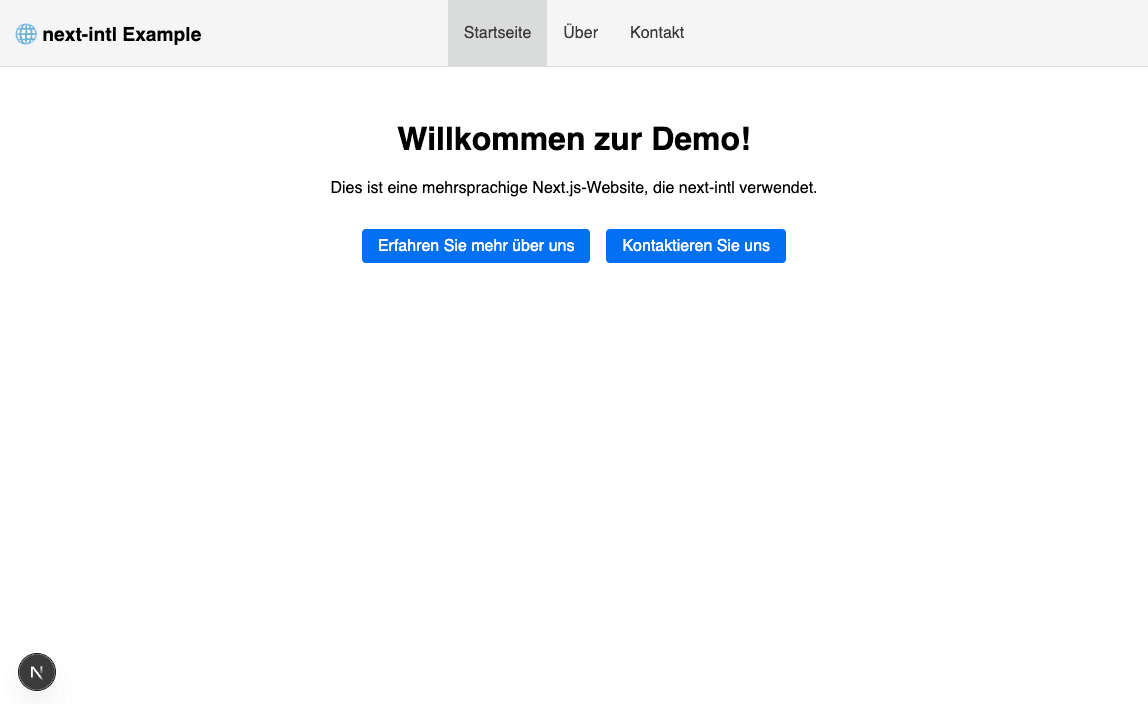
It works! 🎉
How to Change Languages in next-intl
Now that we have our automatic AI translations all set up with next-intl, we want our users to be able to see them!
By default, next-intl will automatically redirect visitors to their preferred language by reading the accept-language header of a visitor’s request. This is great, but we also want to let our visitors manually change languages.
This is how we create a language selector component for next-intl:
components/LocaleSwitcher.tsx'use client';
import { usePathname, useRouter } from '@/i18n/navigation';
import { useLocale } from 'next-intl';
import styles from './LocaleSwticher.module.css';
export default function LocaleSwitcher() {
const locale = useLocale();
const router = useRouter();
const pathname = usePathname();
const switchLocale = (newLocale: string) => {
if (newLocale !== locale) {
router.replace(pathname, { locale: newLocale });
router.refresh();
}
};
return (
<select
className={styles.localeSelect}
value={locale}
onChange={e => switchLocale(e.target.value)}>
<option value="en">EN</option>
<option value="de">DE</option>
<option value="it">IT</option>
</select>
);
}To change languages with next-intl, we import the useRouter and usePathname hooks from our i18n/navigation.ts file. The usePathname hook gives us the current pathname without the current locale. We then pass the pathname and the selected locale to router.replace to apply it.
That’s it! Let’s add it to our navbar:
We now have a fully translated and internationalized Next.js 16 app with next-intl! 🥳
Summing It Up...
With next-intl, the initial configuration may seem a bit daunting. But once it's set up, internationalizing your Next.js App Router project is a breeze, especially when used with i18nexus. Not only do we have automatic AI translations for all our messages, but we are able to later invite professional translators to our i18nexus project to edit and verify our translations.
To learn more about next-intl, I recommend reading the documentation here. Happy internationalizing! 🌏
Level up your localization
It only takes a few minutes to streamline your translations forever.
Get started