How to Localize your React App with react-i18next

Set up and automate your internationalization in minutes.
(6 minute read)
Prefer a different library?
Not sure which library is right for you? Learn the differences
Let's Go!
We’re going to take a look at localizing a React app with react-i18next and integrating with i18nexus for automatic machine translations and managing our content.
Start up the project
I am going to bootstrap together a simple React application using create-react-app:
npx create-react-app my-app
Next, let’s cd into the React app directory and install a few i18next packages:
npm install i18next react-i18next i18next-http-backend i18next-browser-languagedetector --save
Don’t worry, these packages are all very lightweight and easy to use. Here’s what they do:
i18next: The base i18next library.
react-i18next: Gives us React-friendly hooks, components, and functions for i18next.
i18next-http-backend: Let’s us use AJAX for loading translation files.
i18next-browser-languagedetector: Detects your users’ preferred language based on browser settings.
Let’s start up our development server with npm start.
Here we go!
i18next + i18nexus = 🔥
i18nexus allows us to store our app strings in the cloud and automatically translates them to as many languages as we want. Whenever you’re ready to hire professional translators, you simply invite them to the i18nexus project and you’re done.
In one word: AWESOME.
First, sign up for your free i18nexus account. After naming your project you’ll be directed to your language dashboard:
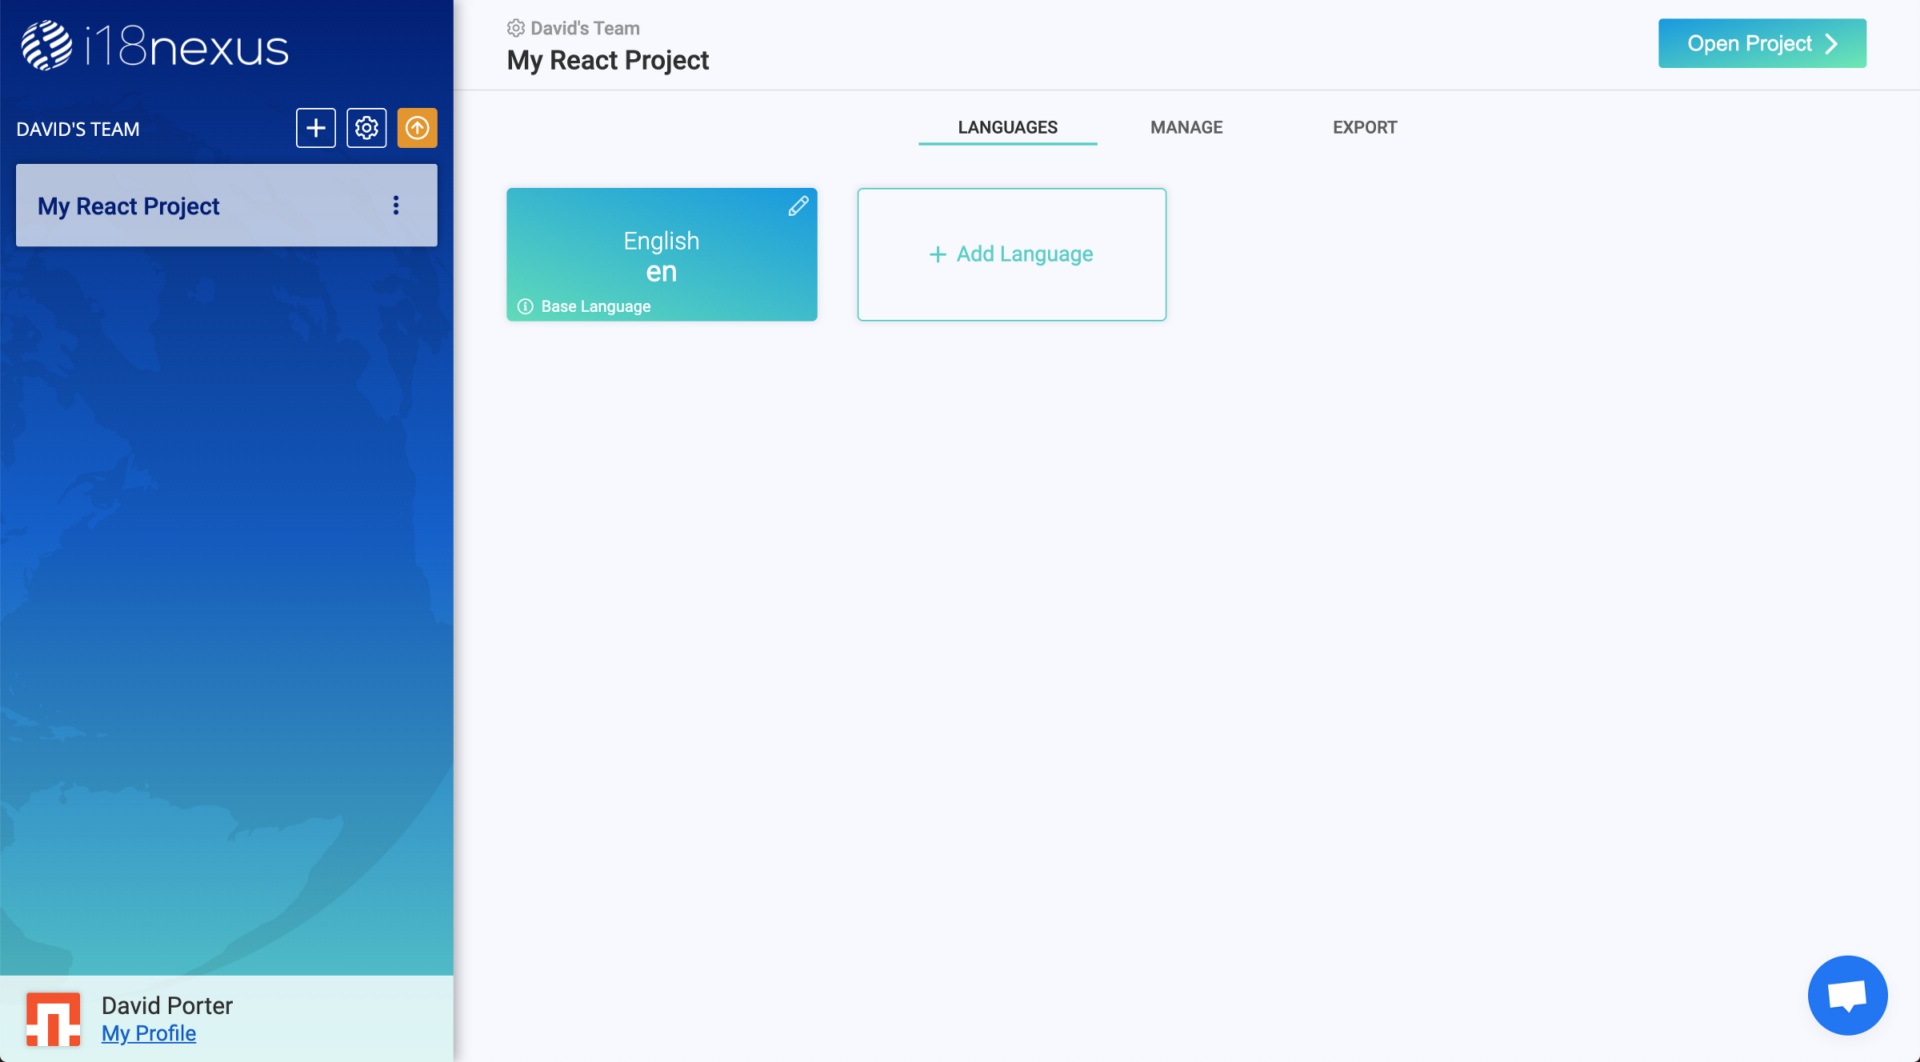
The first language tile is your base language — the language you’re translating from.
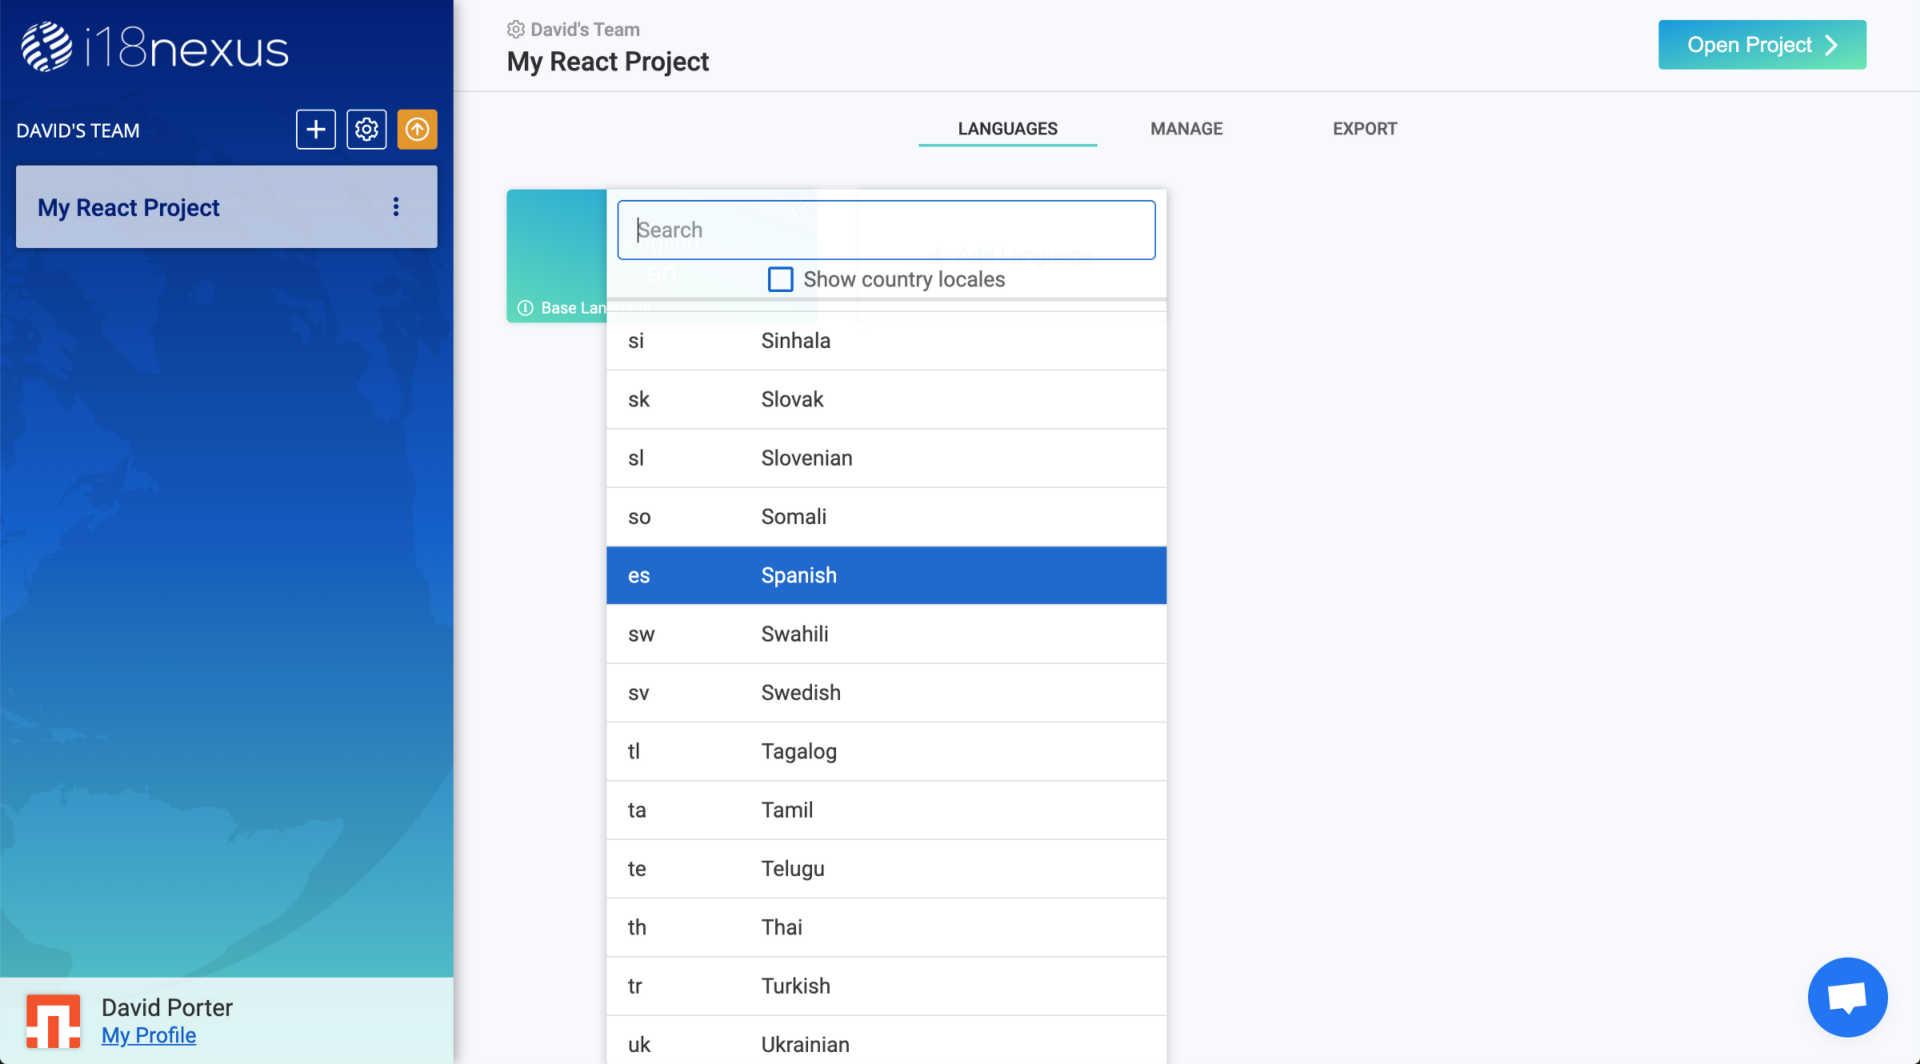
Click Add Language to select a language that you want your app to use. You can select as many as you want. I think I’ll select Spanish:
Next, let’s go to the page where we’ll be adding our strings. Click Open Project in the top right corner to be directed to the Strings Management page.
To add your first string, click Add String. I’m going to add a string that welcomes users to my app:
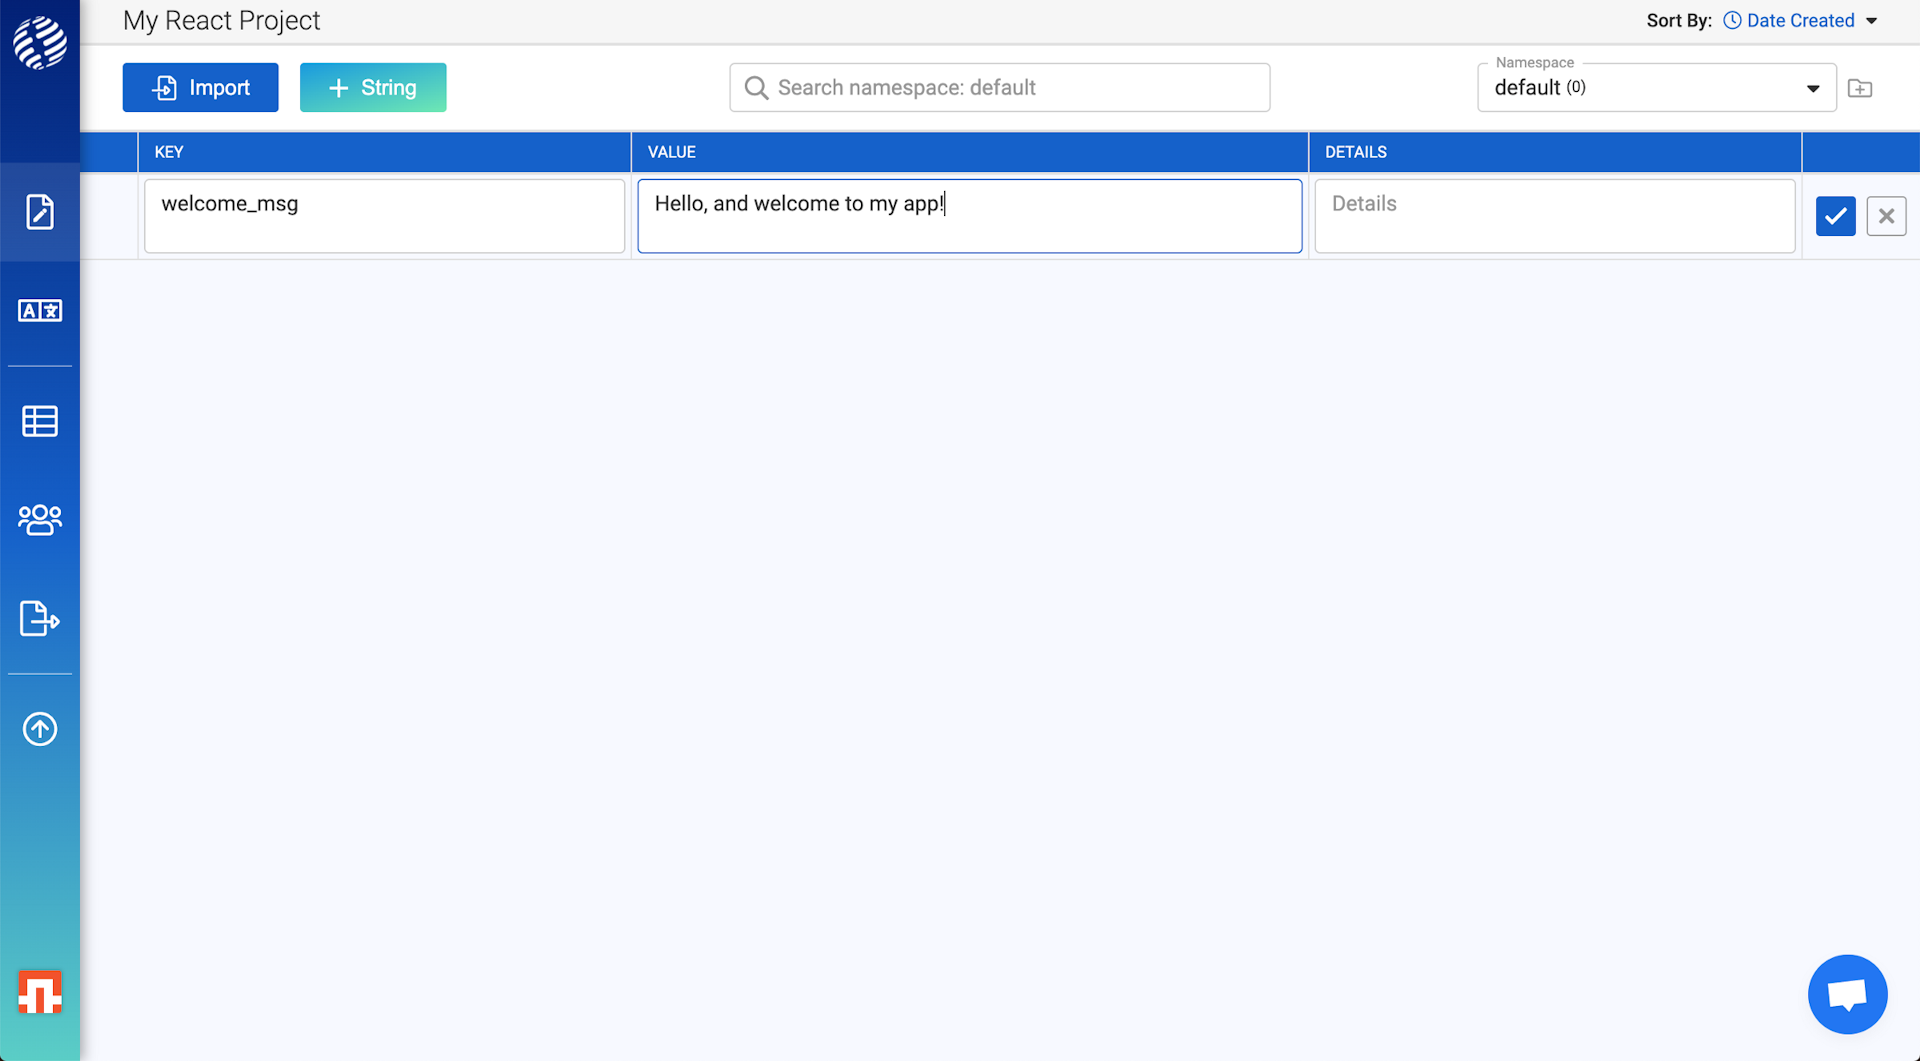
The key is how you’ll reference this string in your app.
The value is the text that will be displayed in your app.
The details field is optional. It is meant to provide any extra information about the context of your string for when you’re ready to bring in professional translators. You can even add an image here for more context!
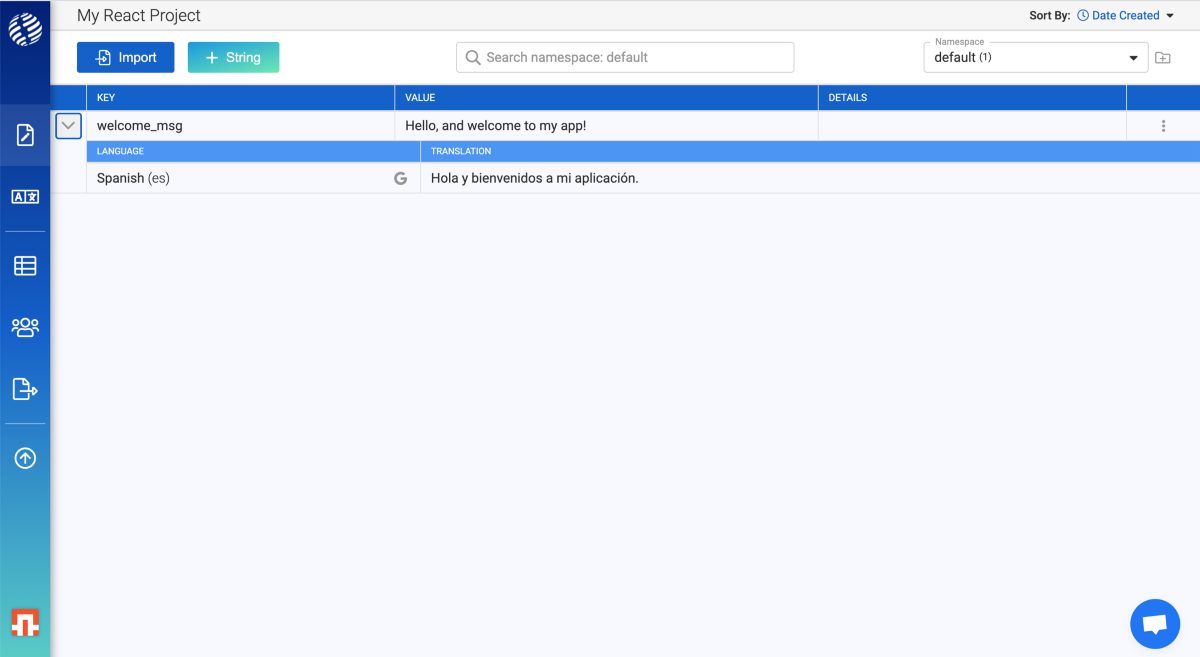
After adding the string, you can expand the row to see the machine translations:
Let's connect to our app
Back in the Export tab, we can find an i18next configuration code snippet to connect our React app to our i18nexus translations. Make sure to copy from the React tab:
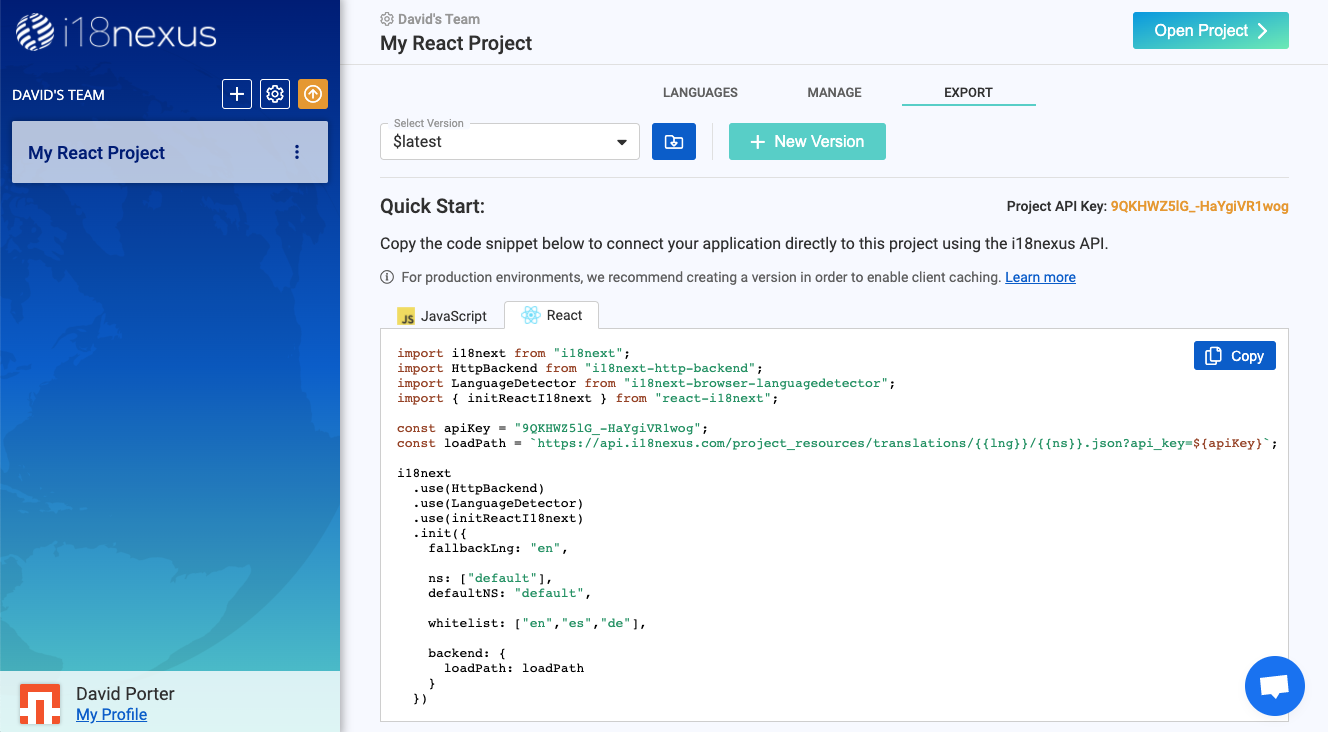
Let’s create a file called i18n.js in our src folder, and then paste in the code snippet:
src/i18n.jsimport i18next from "i18next";
import HttpBackend from "i18next-http-backend";
import LanguageDetector from "i18next-browser-languagedetector";
import { initReactI18next } from "react-i18next";
const apiKey = "9QKHWZ51G_-HaYgiVR1wog";
const loadPath = `https://api.i18nexus.com/project_resources/translations/{{lng}}/{{ns}}.json?api_key=${apiKey}`;
i18next
.use(HttpBackend)
.use(LanguageDetector)
.use(initReactI18next)
.init({
fallbackLng: "en",
ns: ["default"],
defaultNS: "default",
supportedLngs: ["en","es","de"],
backend: {
loadPath: loadPath
}
})*Learn more about i18next configuration options here.
This code is asynchronously fetching our latest strings from the i18nexus API. For production environments it is recommended to use the i18nexus CDN and implement browser caching. You can find an example of this in the Export page in your i18nexus project.
I’m going to import the i18n.js file in index.js, and then use React’s Suspense component to prevent rendering until the request is complete.
My index.js file now looks like this:
index.jsimport React, { Suspense } from "react";
import ReactDOM from "react-dom";
import "./index.css";
import App from "./App";
import * as serviceWorker from "./serviceWorker";
import "./i18n.js";
ReactDOM.render(
<React.StrictMode>
<Suspense fallback="loading">
<App />
</Suspense>
</React.StrictMode>,
document.getElementById("root")
);
serviceWorker.unregister(); Rendering our strings
When the app loads, it is fetching all of our strings from i18nexus. Right now, my app just has the default create-react-app page with hardcoded strings:
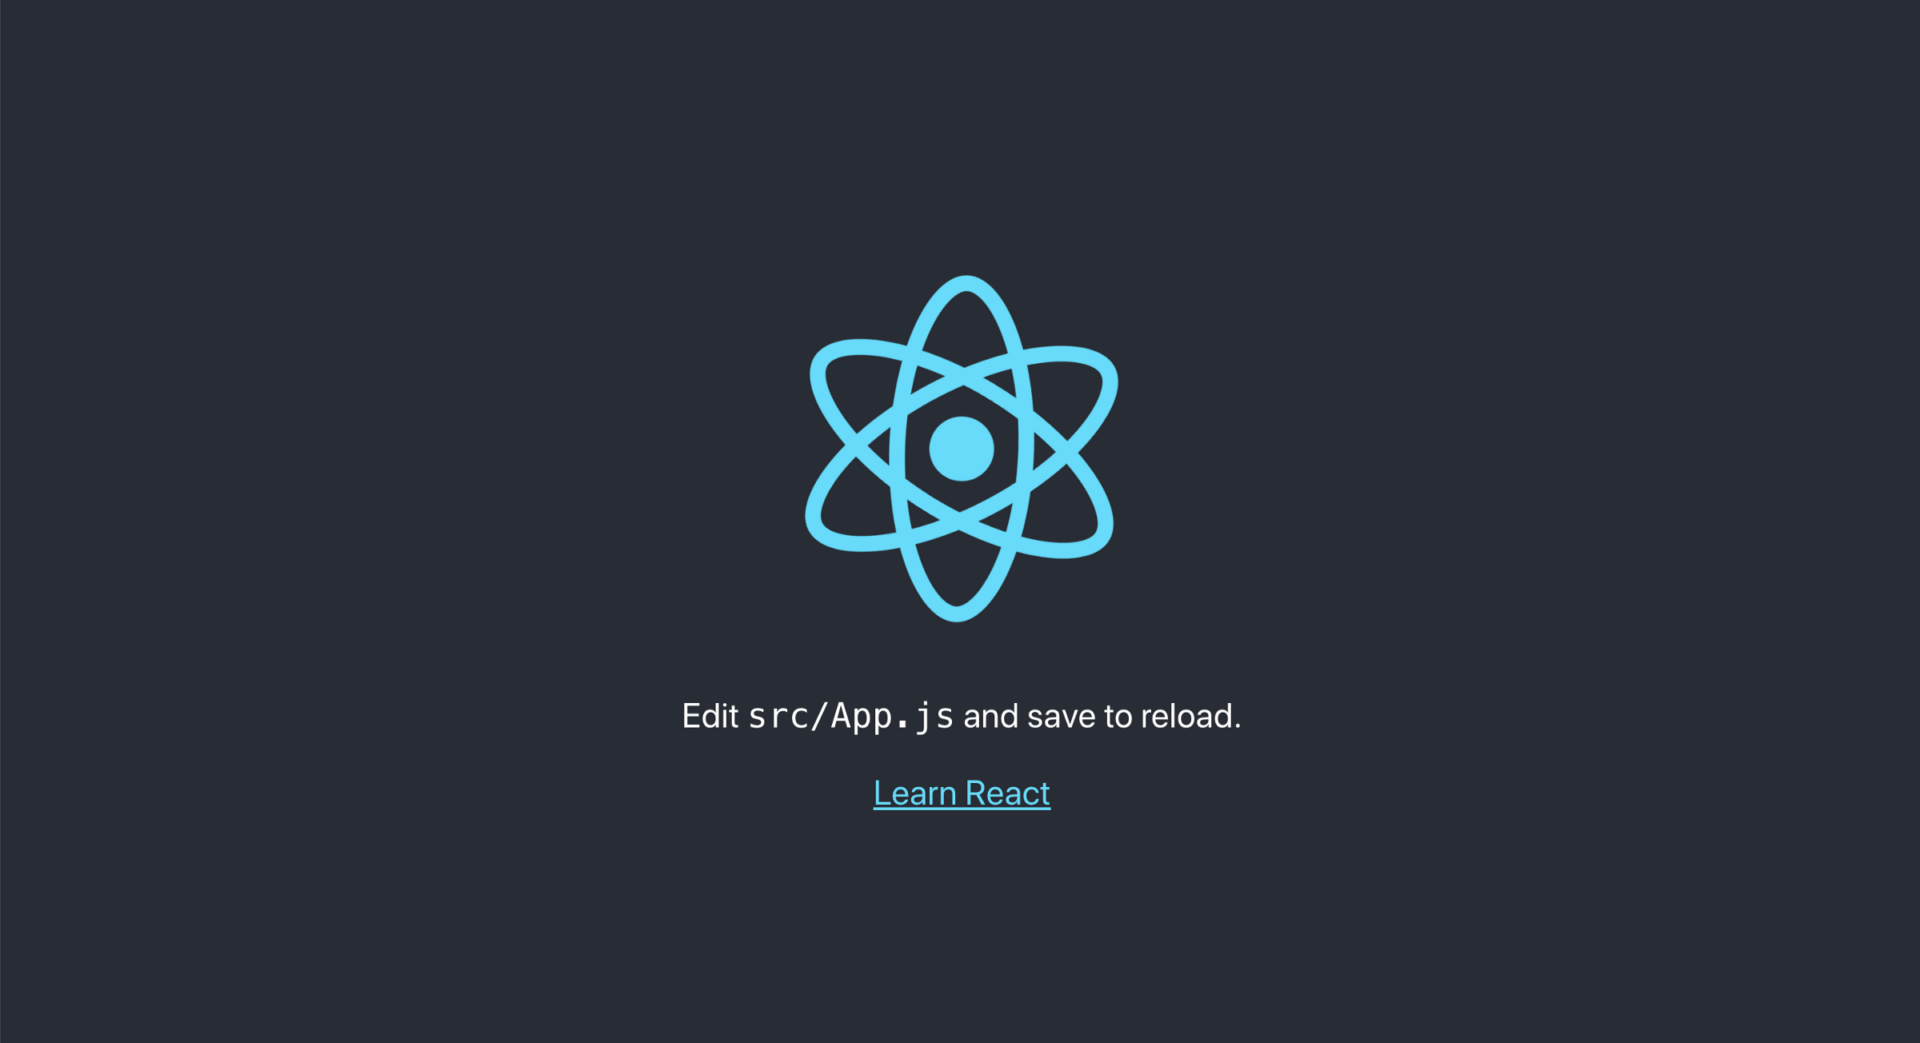
And here it is!

Since my personal browser language is set to English, i18next has automatically chosen to render the English version of the string. This is thanks to the i18next-browser-languagedetector library!
To let the user choose their language, you would simply create a dropdown that calls i18next.changeLanguage(<language_code>) on change. Of course you can read more about all the i18next functions in the i18next docs.
For now, if you want to preview what your app would look like in another language, add the lng query parameter to the URL. If I load the app with http://localhost:3000/?lng=es, i18next will use the Spanish translations:

AWESOME!
Interpolation
Let’s add another string to i18nexus that uses interpolation. (Learn more about i18next interpolation here).
In i18nexus, I’m going to create a string with the value “My name is {{ name }}”. i18next uses double curly braces for interpolation:

Now let’s use the t function with interpolation:
src/App.jsimport React from "react";
import logo from "./logo.svg";
import "./App.css";
import { useTranslation } from "react-i18next";
function App() {
const { t } = useTranslation();
const userName = "David";
return (
<div className="App">
<header className="App-header">
<img src={logo} className="App-logo" alt="logo" />
<p>{t("welcome_msg")}</p>
<p>{t("my_name", { name: userName })}</p>
</header>
</div>
);
}
export default App;And now we see the interpolated value:

Your app has access to all strings and translations immediately after you add them to i18nexus. I love it.
Now I’m going to add German to my project in the i18nexus dashboard:
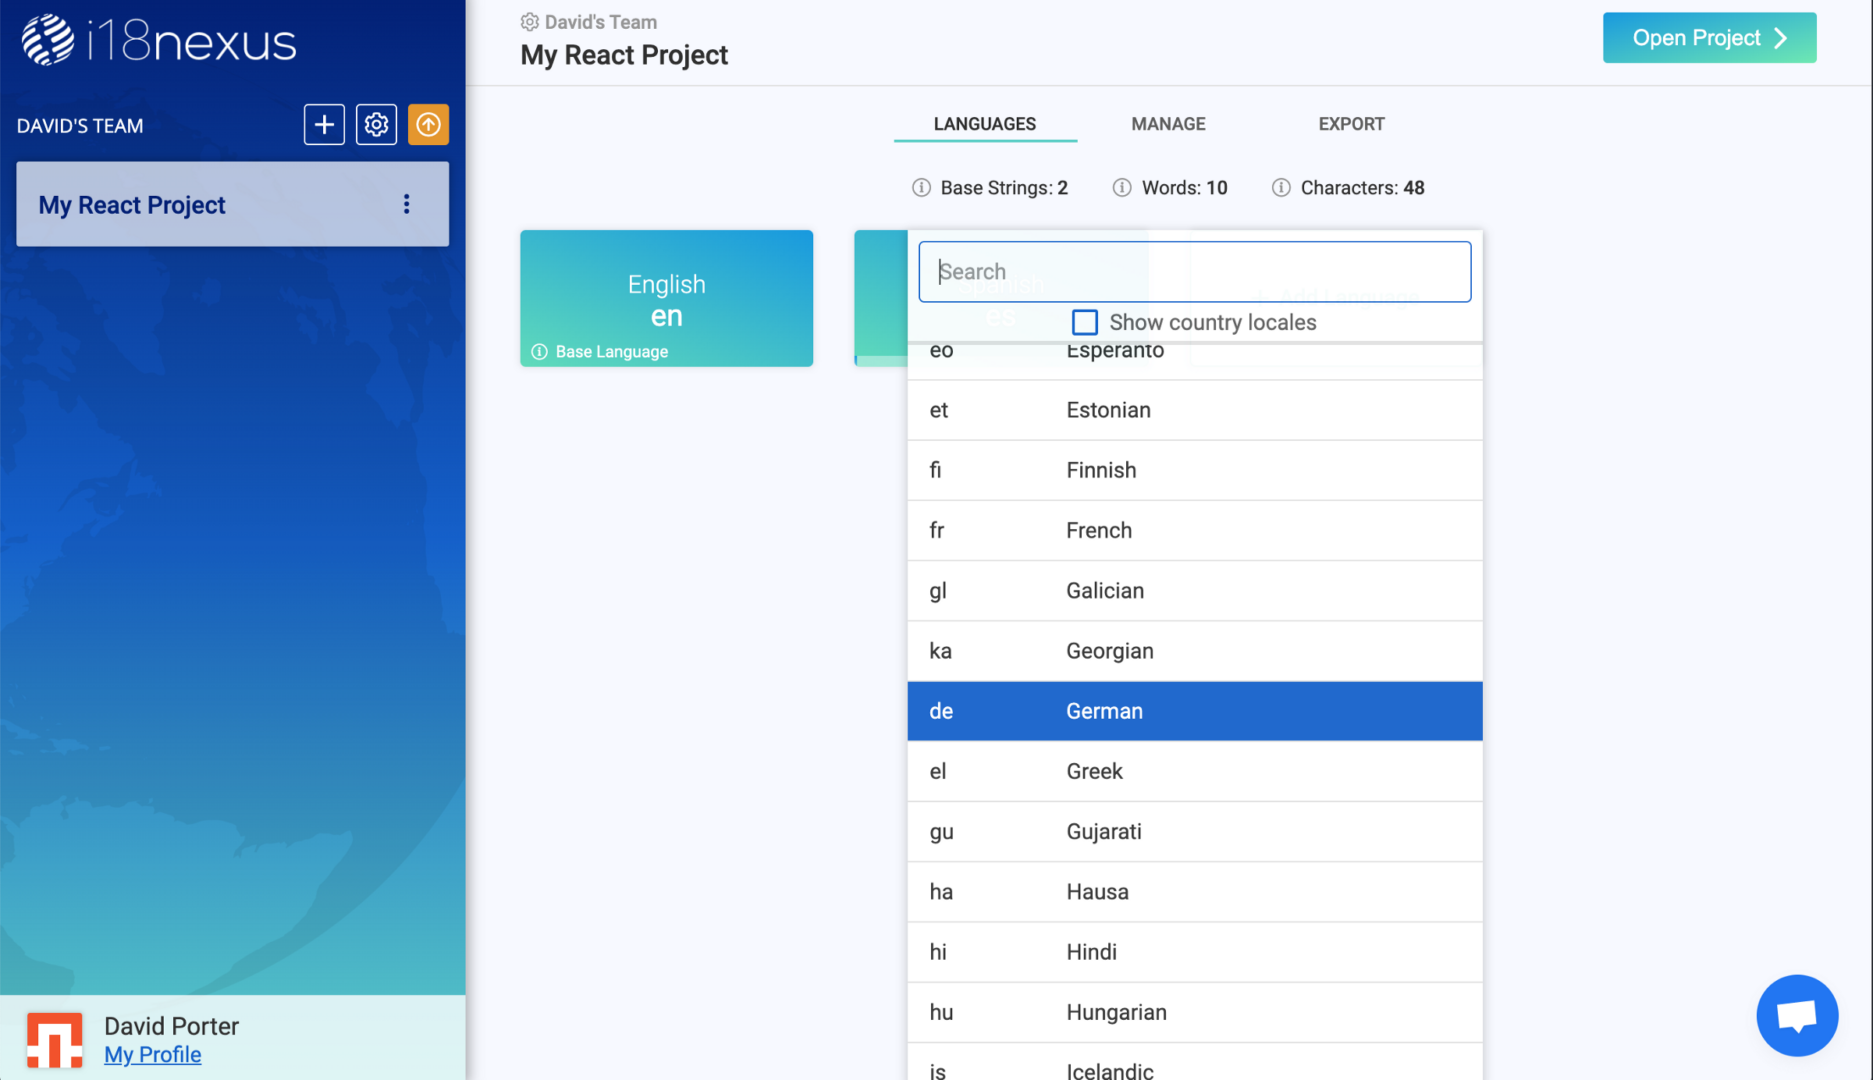
When you add another language to your i18nexus project, remember to update the supportedLngs parameter in your i18n.js file by adding the new language code to the array.
Alternatively, you can copy/paste the code snippet from the Export tab again. I’m just going to manually add “de” to my supportedLngs:
src/i18n.jsi18next
.use(HttpBackend)
.use(LanguageDetector)
.use(initReactI18next)
.init({
fallbackLng: "en",
ns: ["default"],
defaultNS: "default",
supportedLngs: ["en", "es", "de"],
backend: {
loadPath: loadPath
}
});Now let’s visit http://localhost:3000/?lng=de to see our app in German:
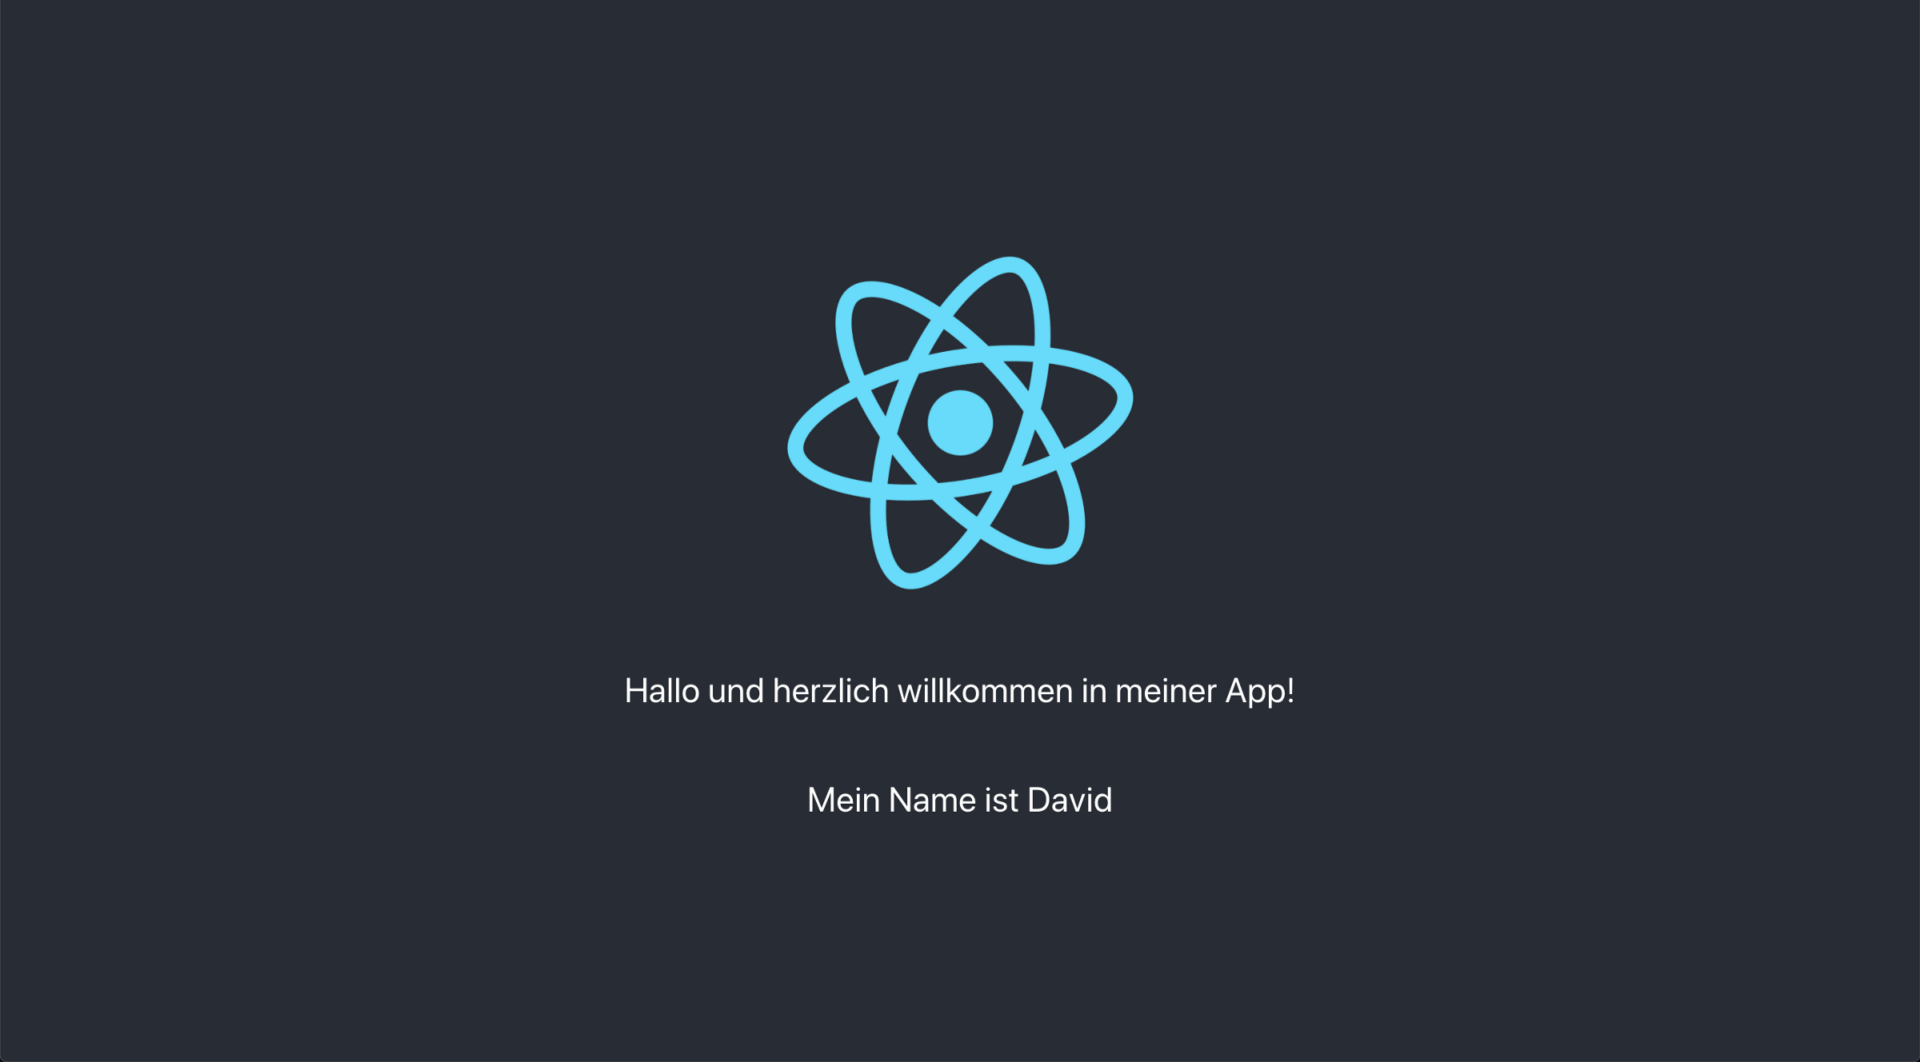
Awesome! (Or should I say “das ist fantastisch!”)
To sum it up
i18next and i18nexus are an amazing duo for scalable localization in React. We have only scratched the surface with the customization available in both i18next and i18nexus, but hopefully this was enough to get you up and going!
Level up your localization
It only takes a few minutes to streamline your translations forever.
Get started